# Task details
# Anatomy

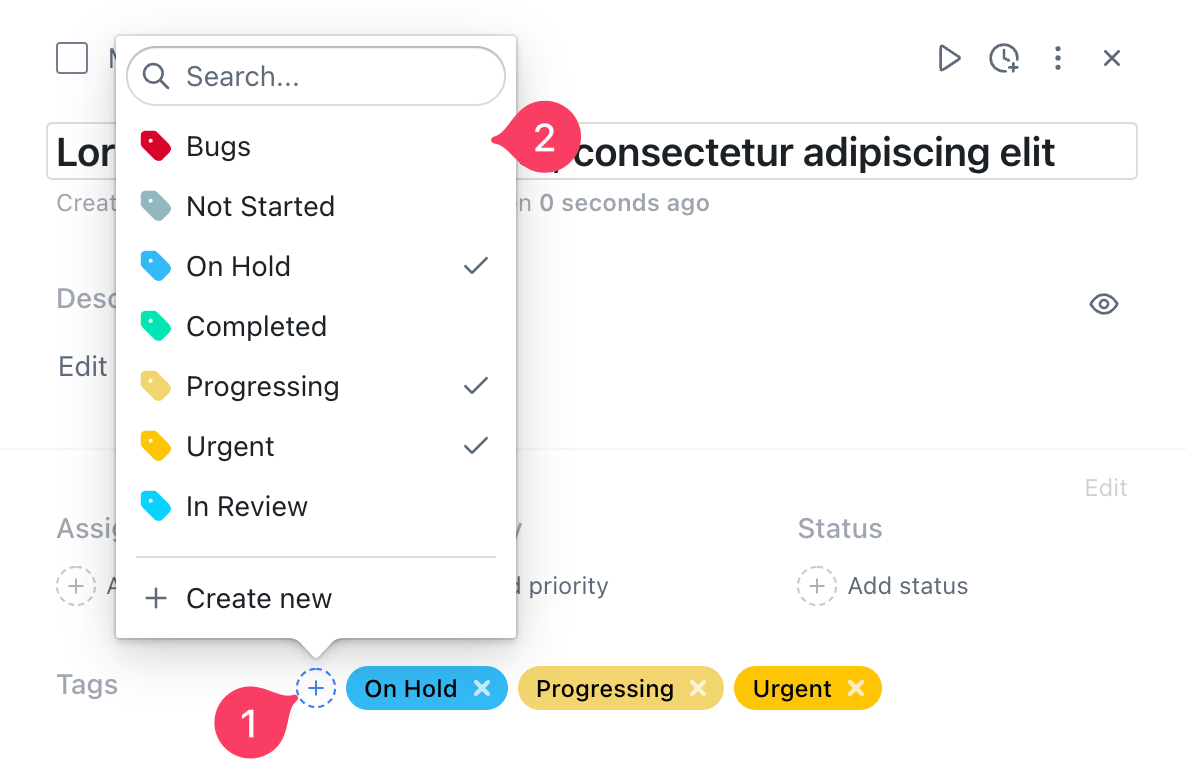
# Assigning tags
There are 3 ways of assigning tags to a task:
- from the task title by hitting
#and using the autocomplete to select a tag from the drop-down menu - by clicking the
Add tagbutton and selecting a tag from the popover menu - when creating a new task hitting
#will autocomplete your tags
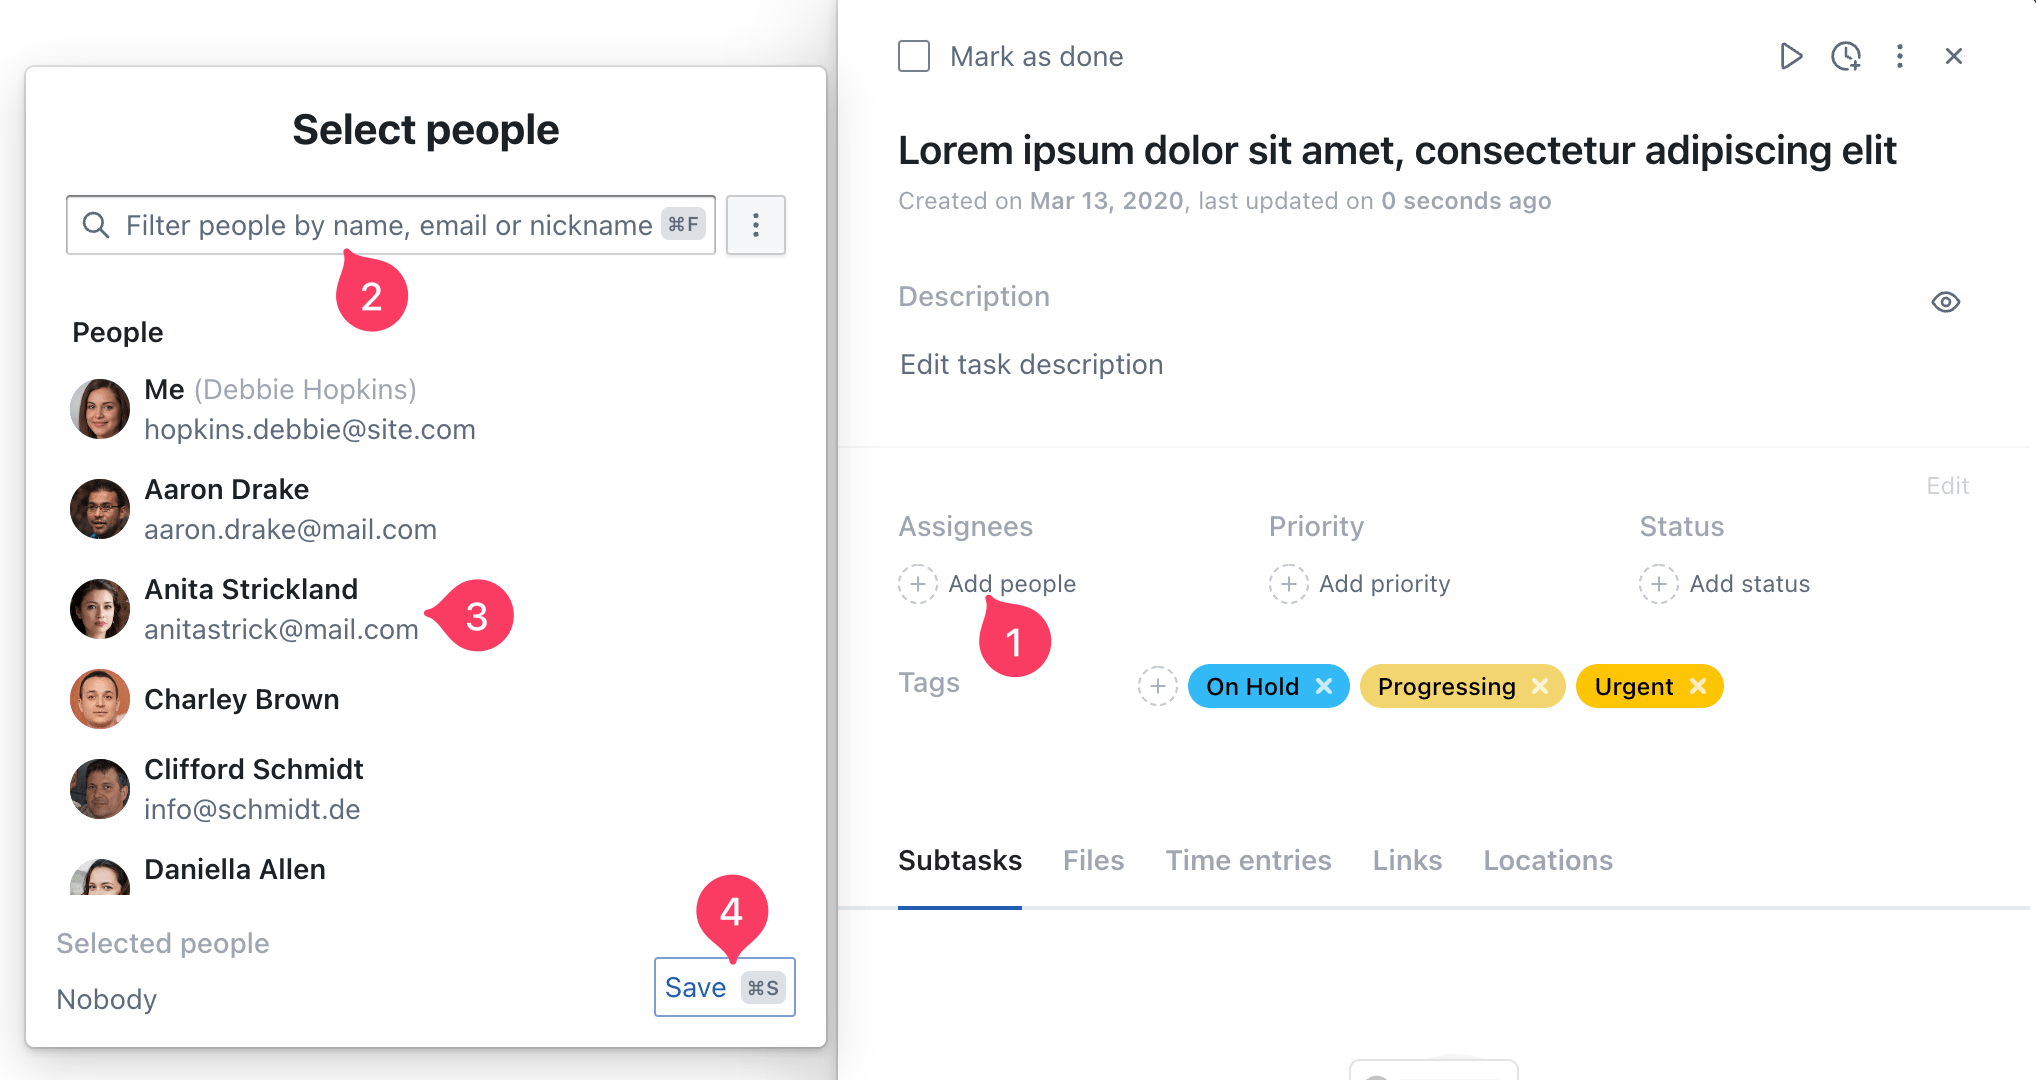
# Assigning people
There are 2 ways to assign people to a task:
- from the task title by hitting
@and using the autocomplete to select a person from the drop-down menu - by clicking the
Add peoplebutton and selecting a person from the popover.
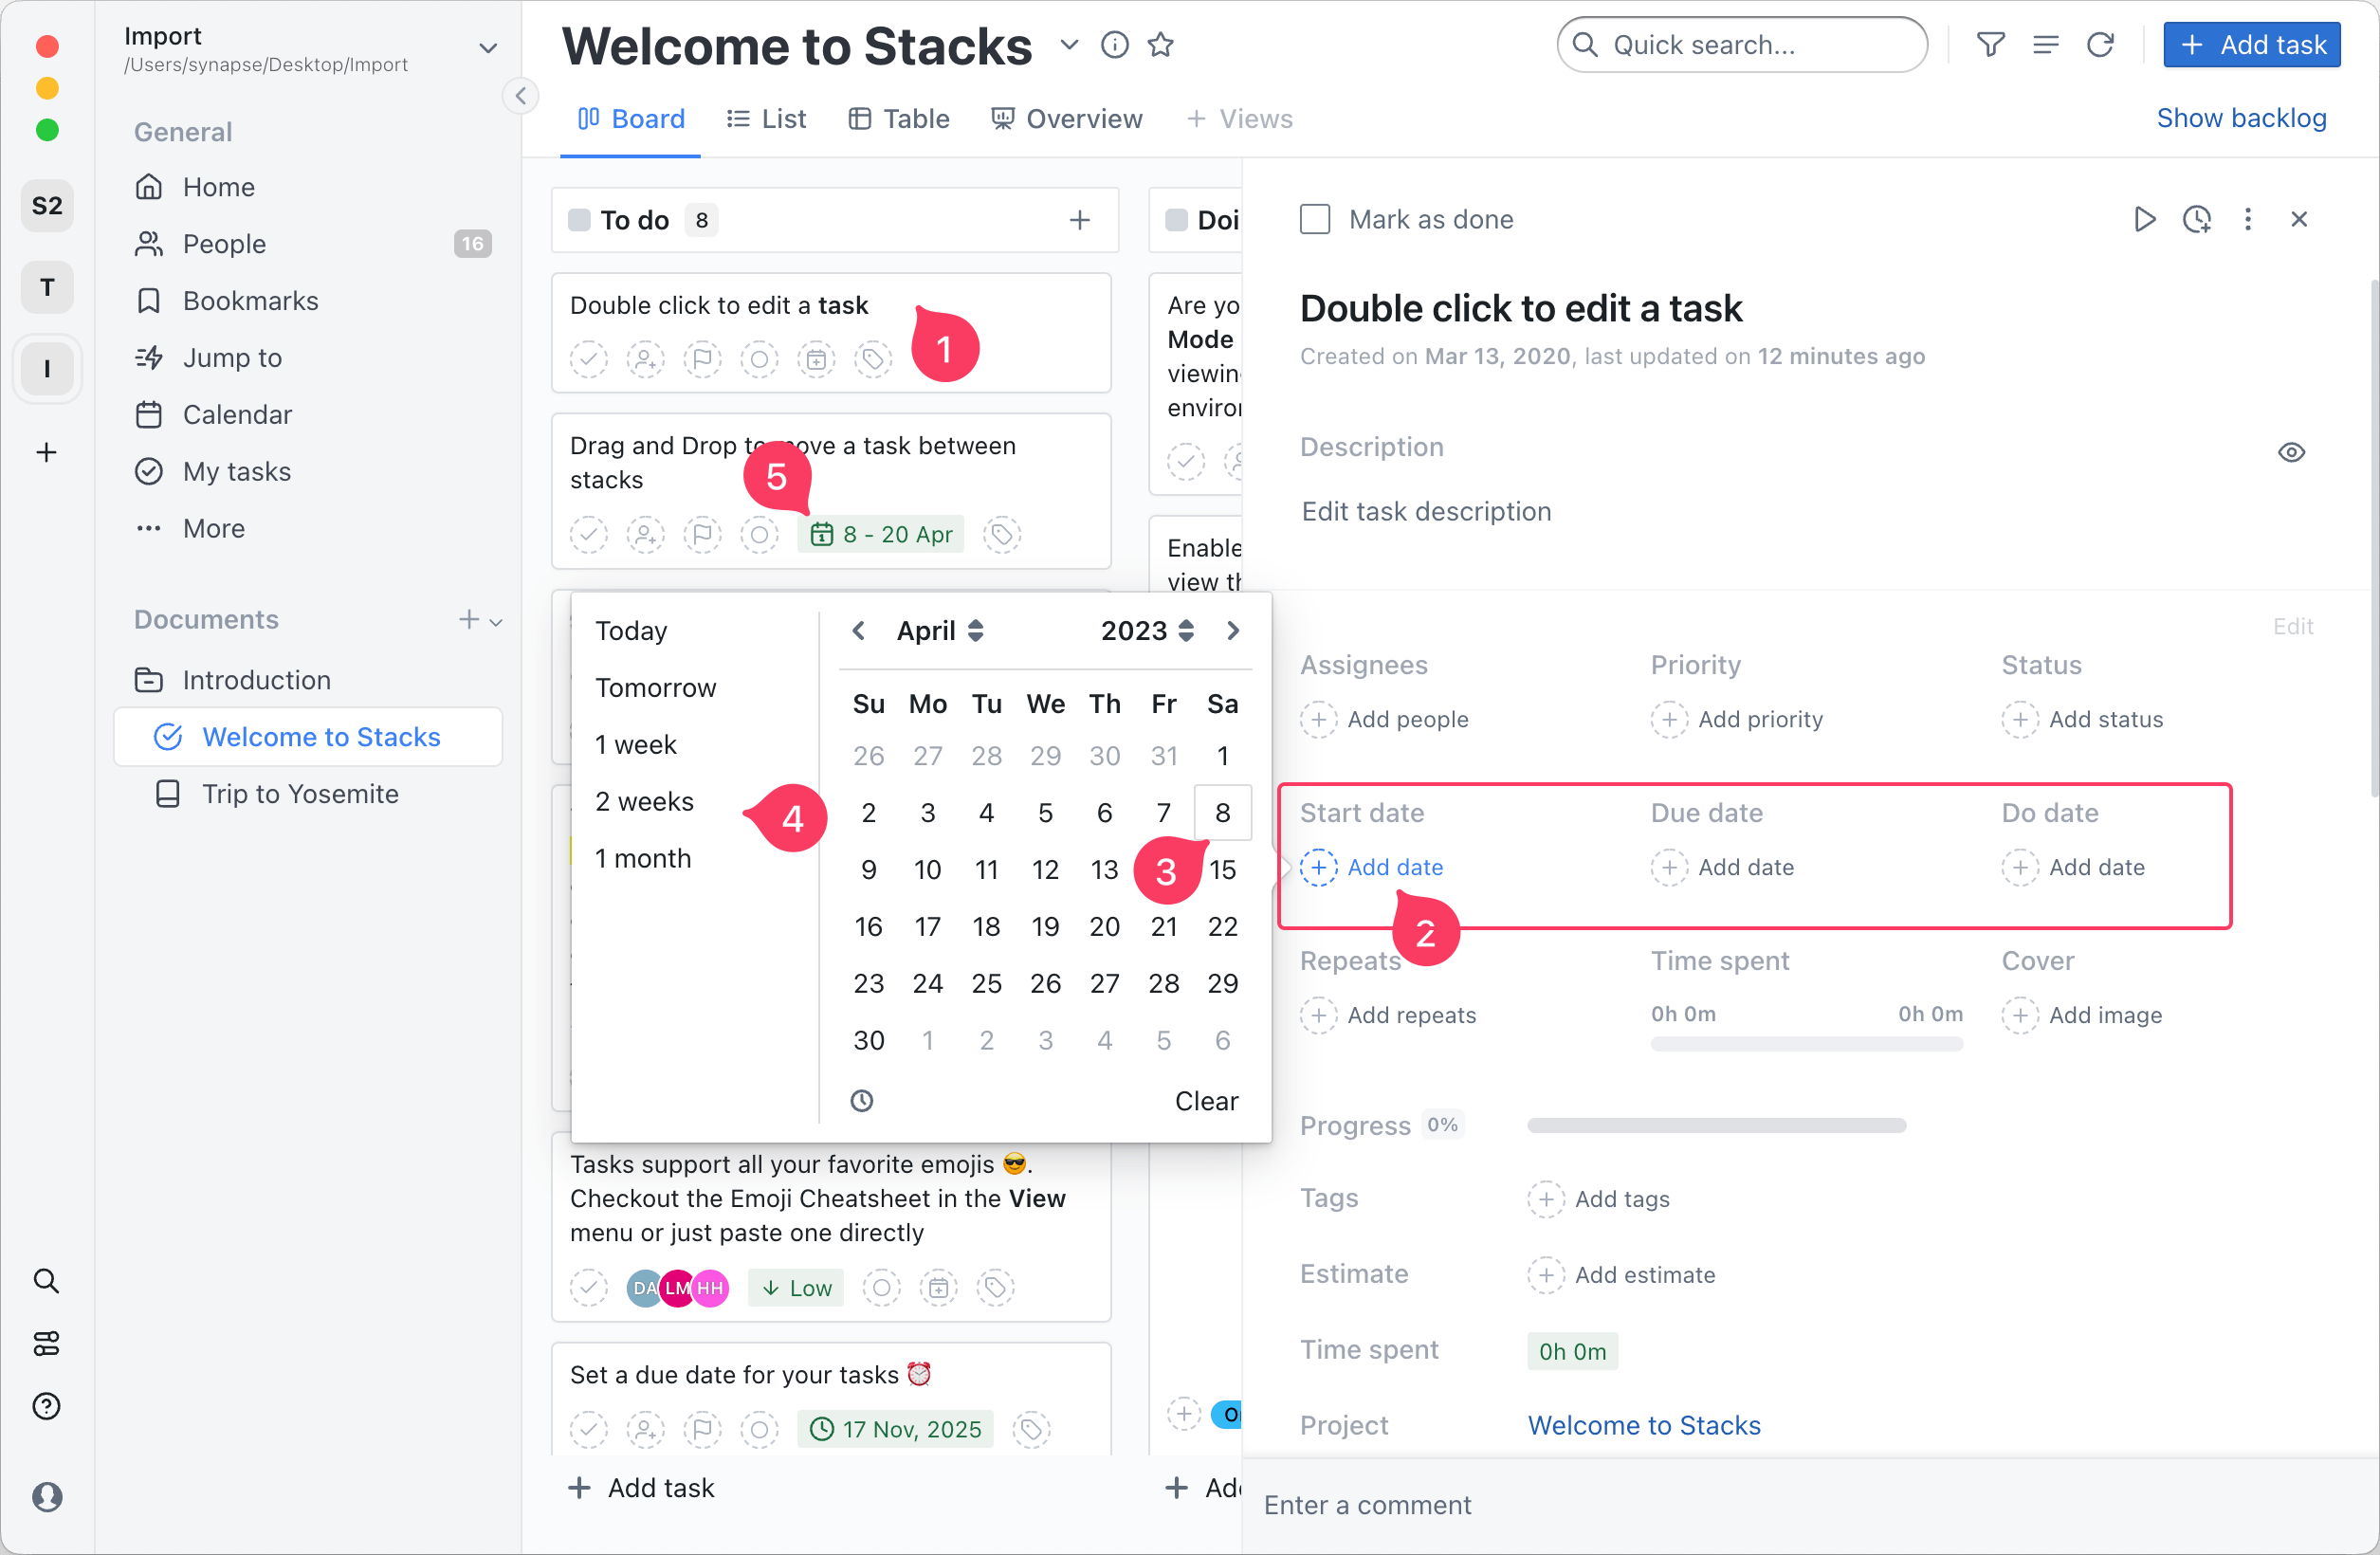
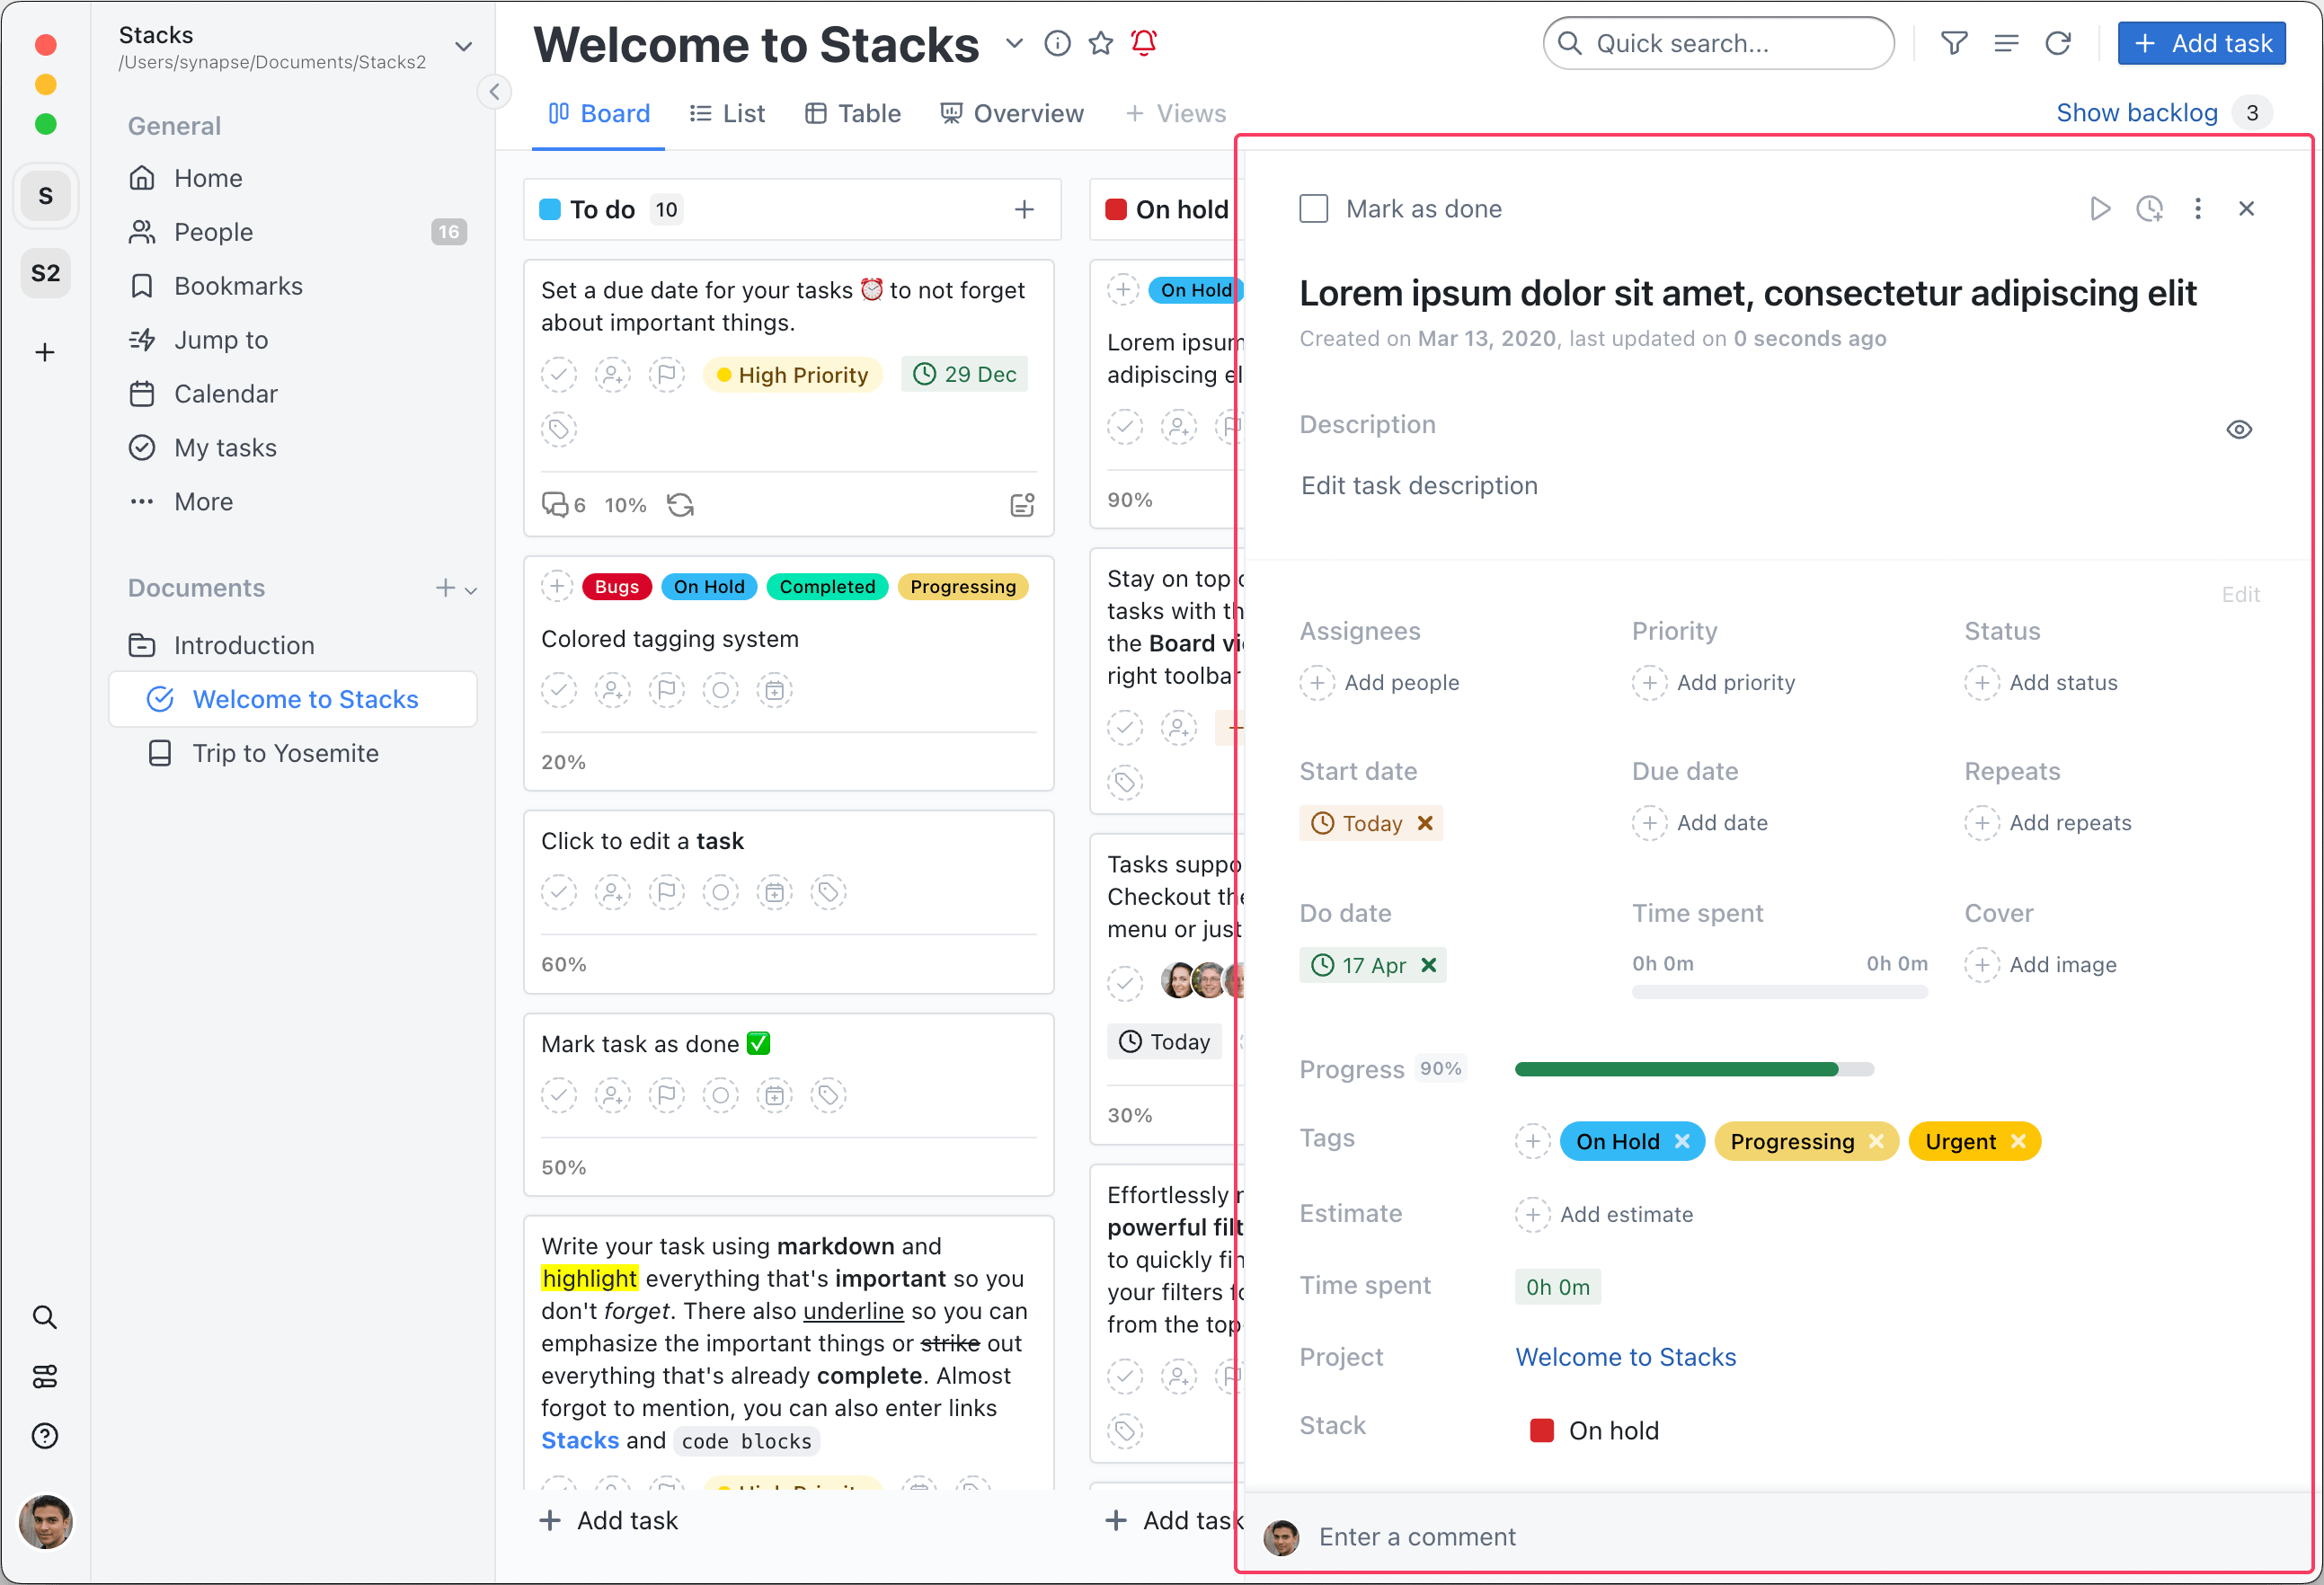
# Setting a start, due or do dates
The start and due dates are important for indicating when you should begin working on a task and by when it should be completed. The date picker also comes with a handy shortcuts sidebar to help you easily pick from a common list of dates. (Optional) The do date on the other hand it would be a good indicator for when a task should be picked up for work
To add a date follow these simple steps:
- Click the task where you want to add a date
- Click the
Add datebutton for the start, due, or do date - Select a day
- (Optional) select a date via the shortcut
- The date will be shown in the task card
TIP
The date indicator will be marked in orange for dates due today while in red for the overdue ones.
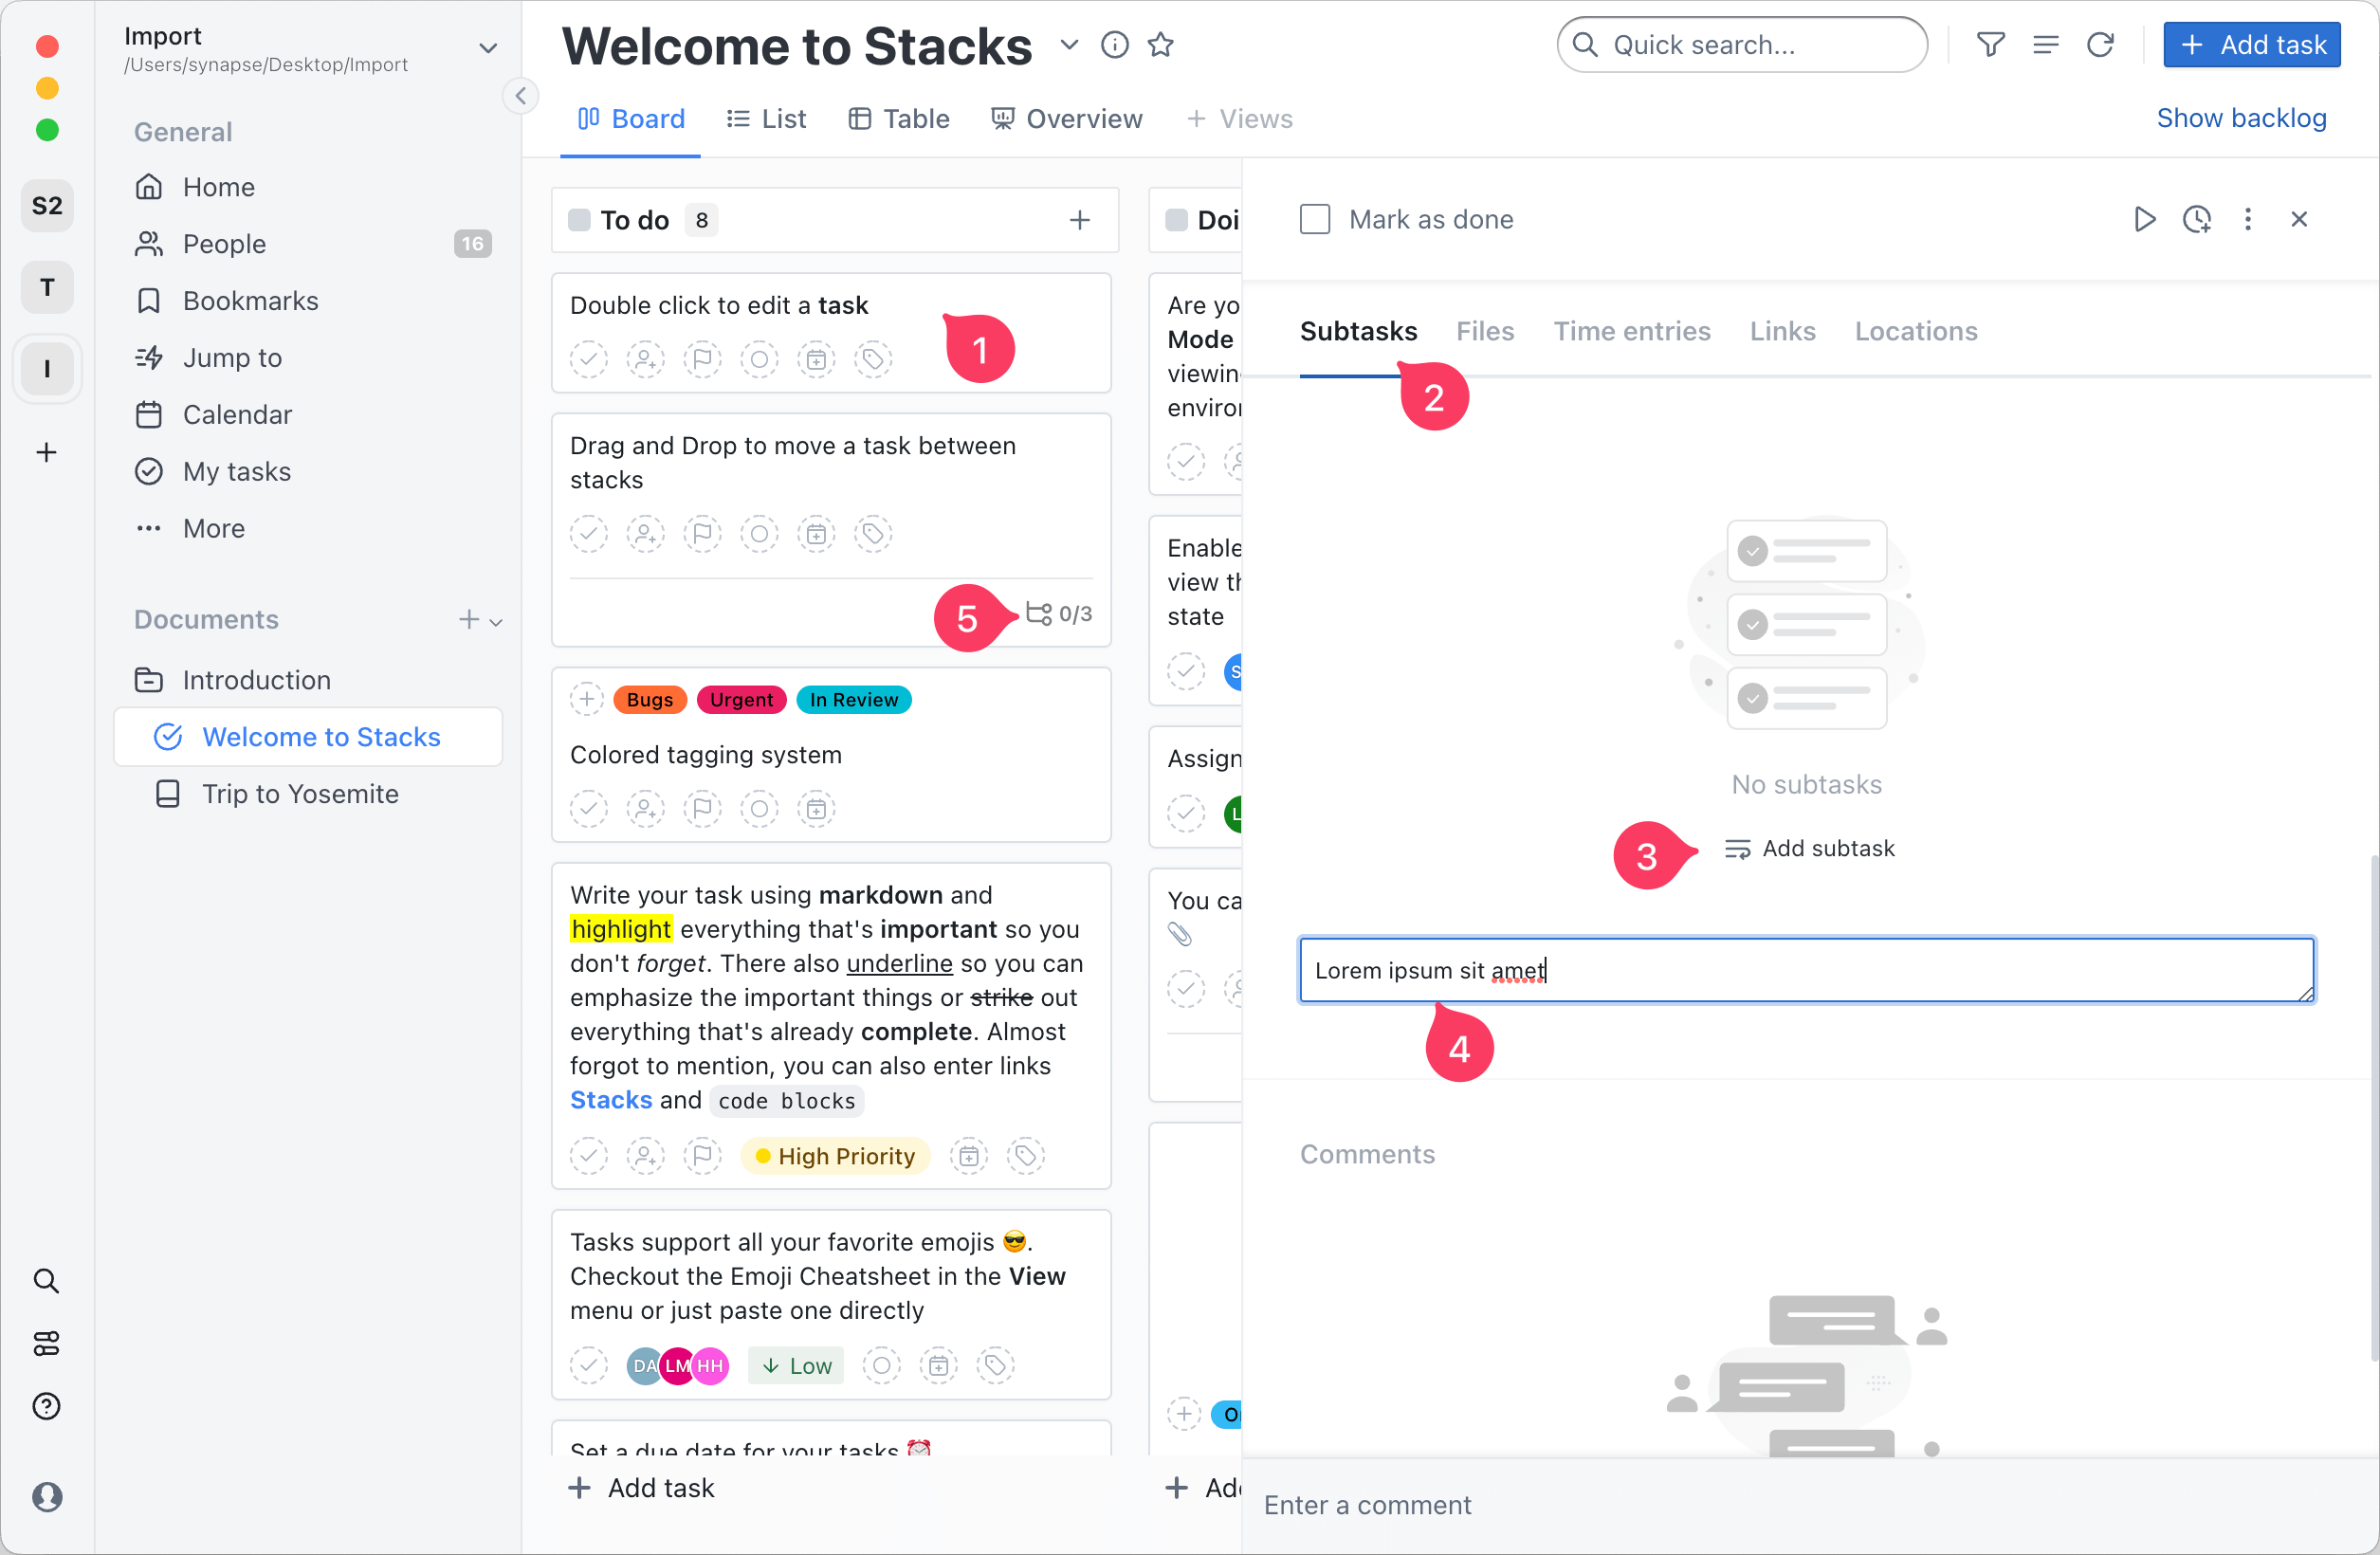
# Adding subtasks
To add subtasks follow these simple steps:
- Click the task where you want to add a subtask
- Scroll down and click the
Subtaskstab - Click the
Add subtaskbutton - Enter the task title in the input
- The task card will indicate the number of subtasks
TIP
You can change the title of each checklists and toggle the visibility of the completed subtasks
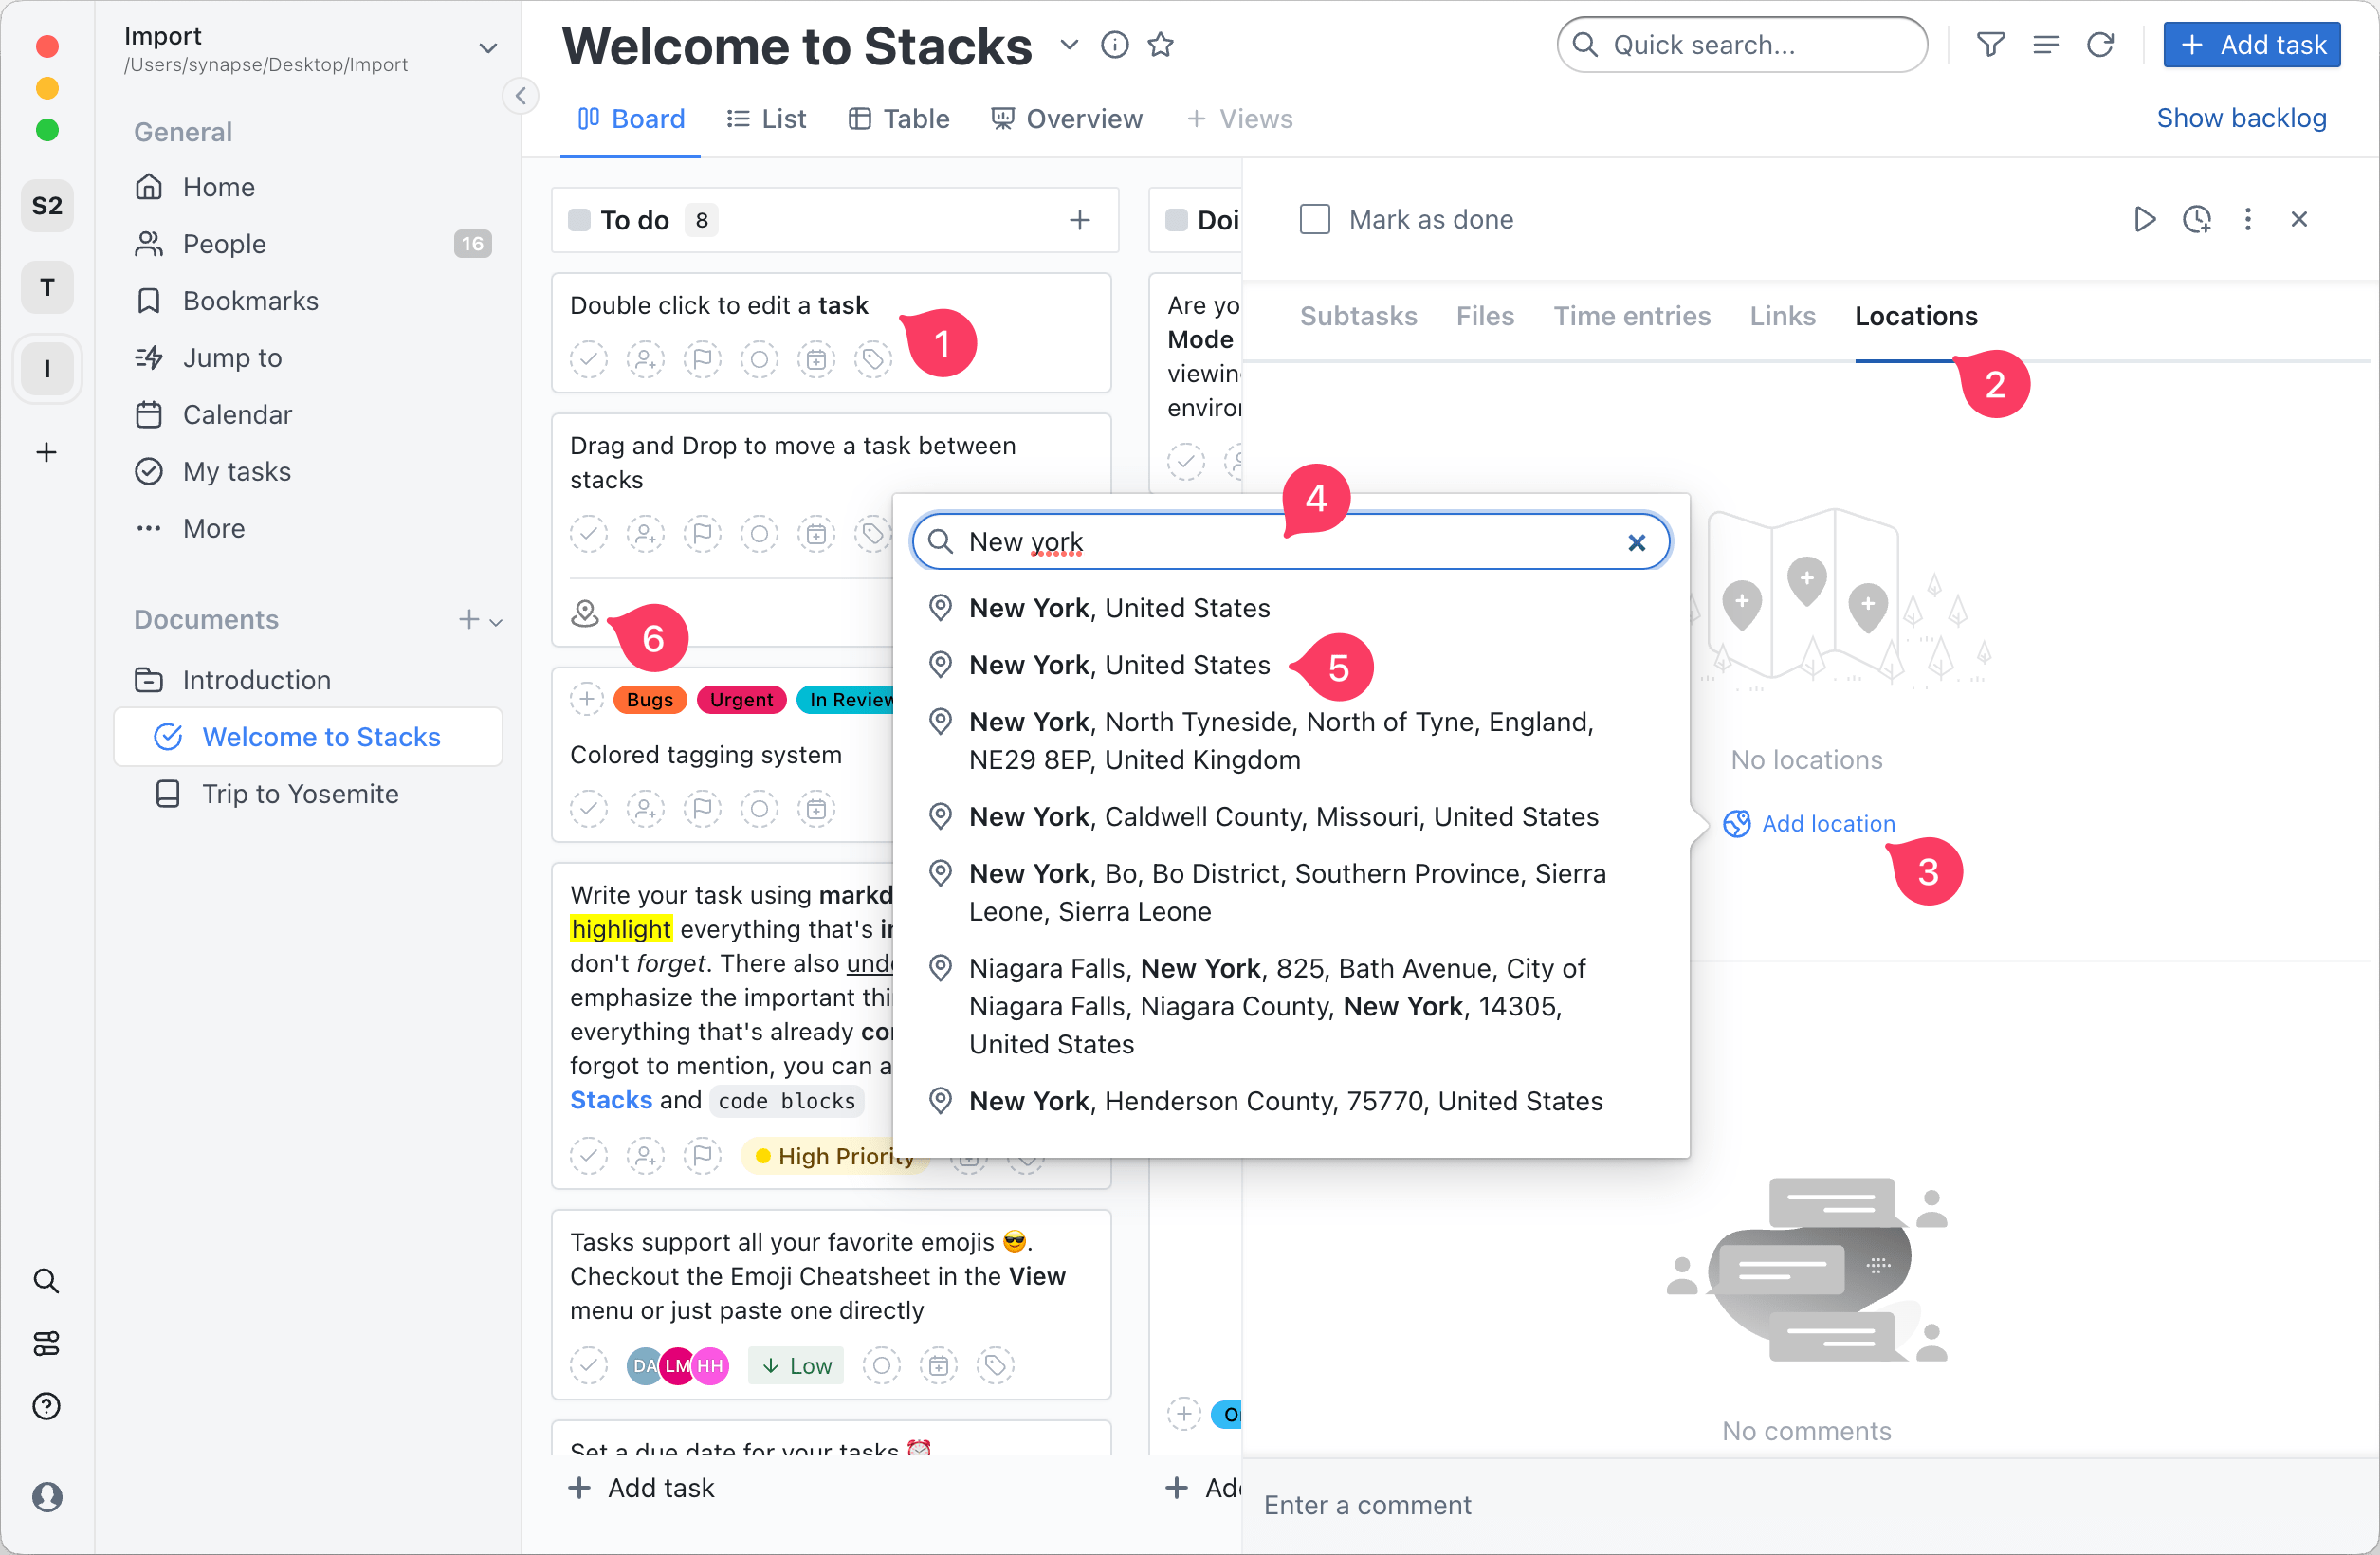
# Adding a location
Task locations can let you see your work in a geographical environment. Each task can have an unlimited number of pins. To add a location follow these simple steps:
- Click the task where you want to add a location
- Scroll down and click the
Locationstab - Click the
Add locationbutton - Type a locations name
- Select from the list of locations found
- The task card will indicate if the it contains any saved locations
TIP
You can view all tasks locations from the World view
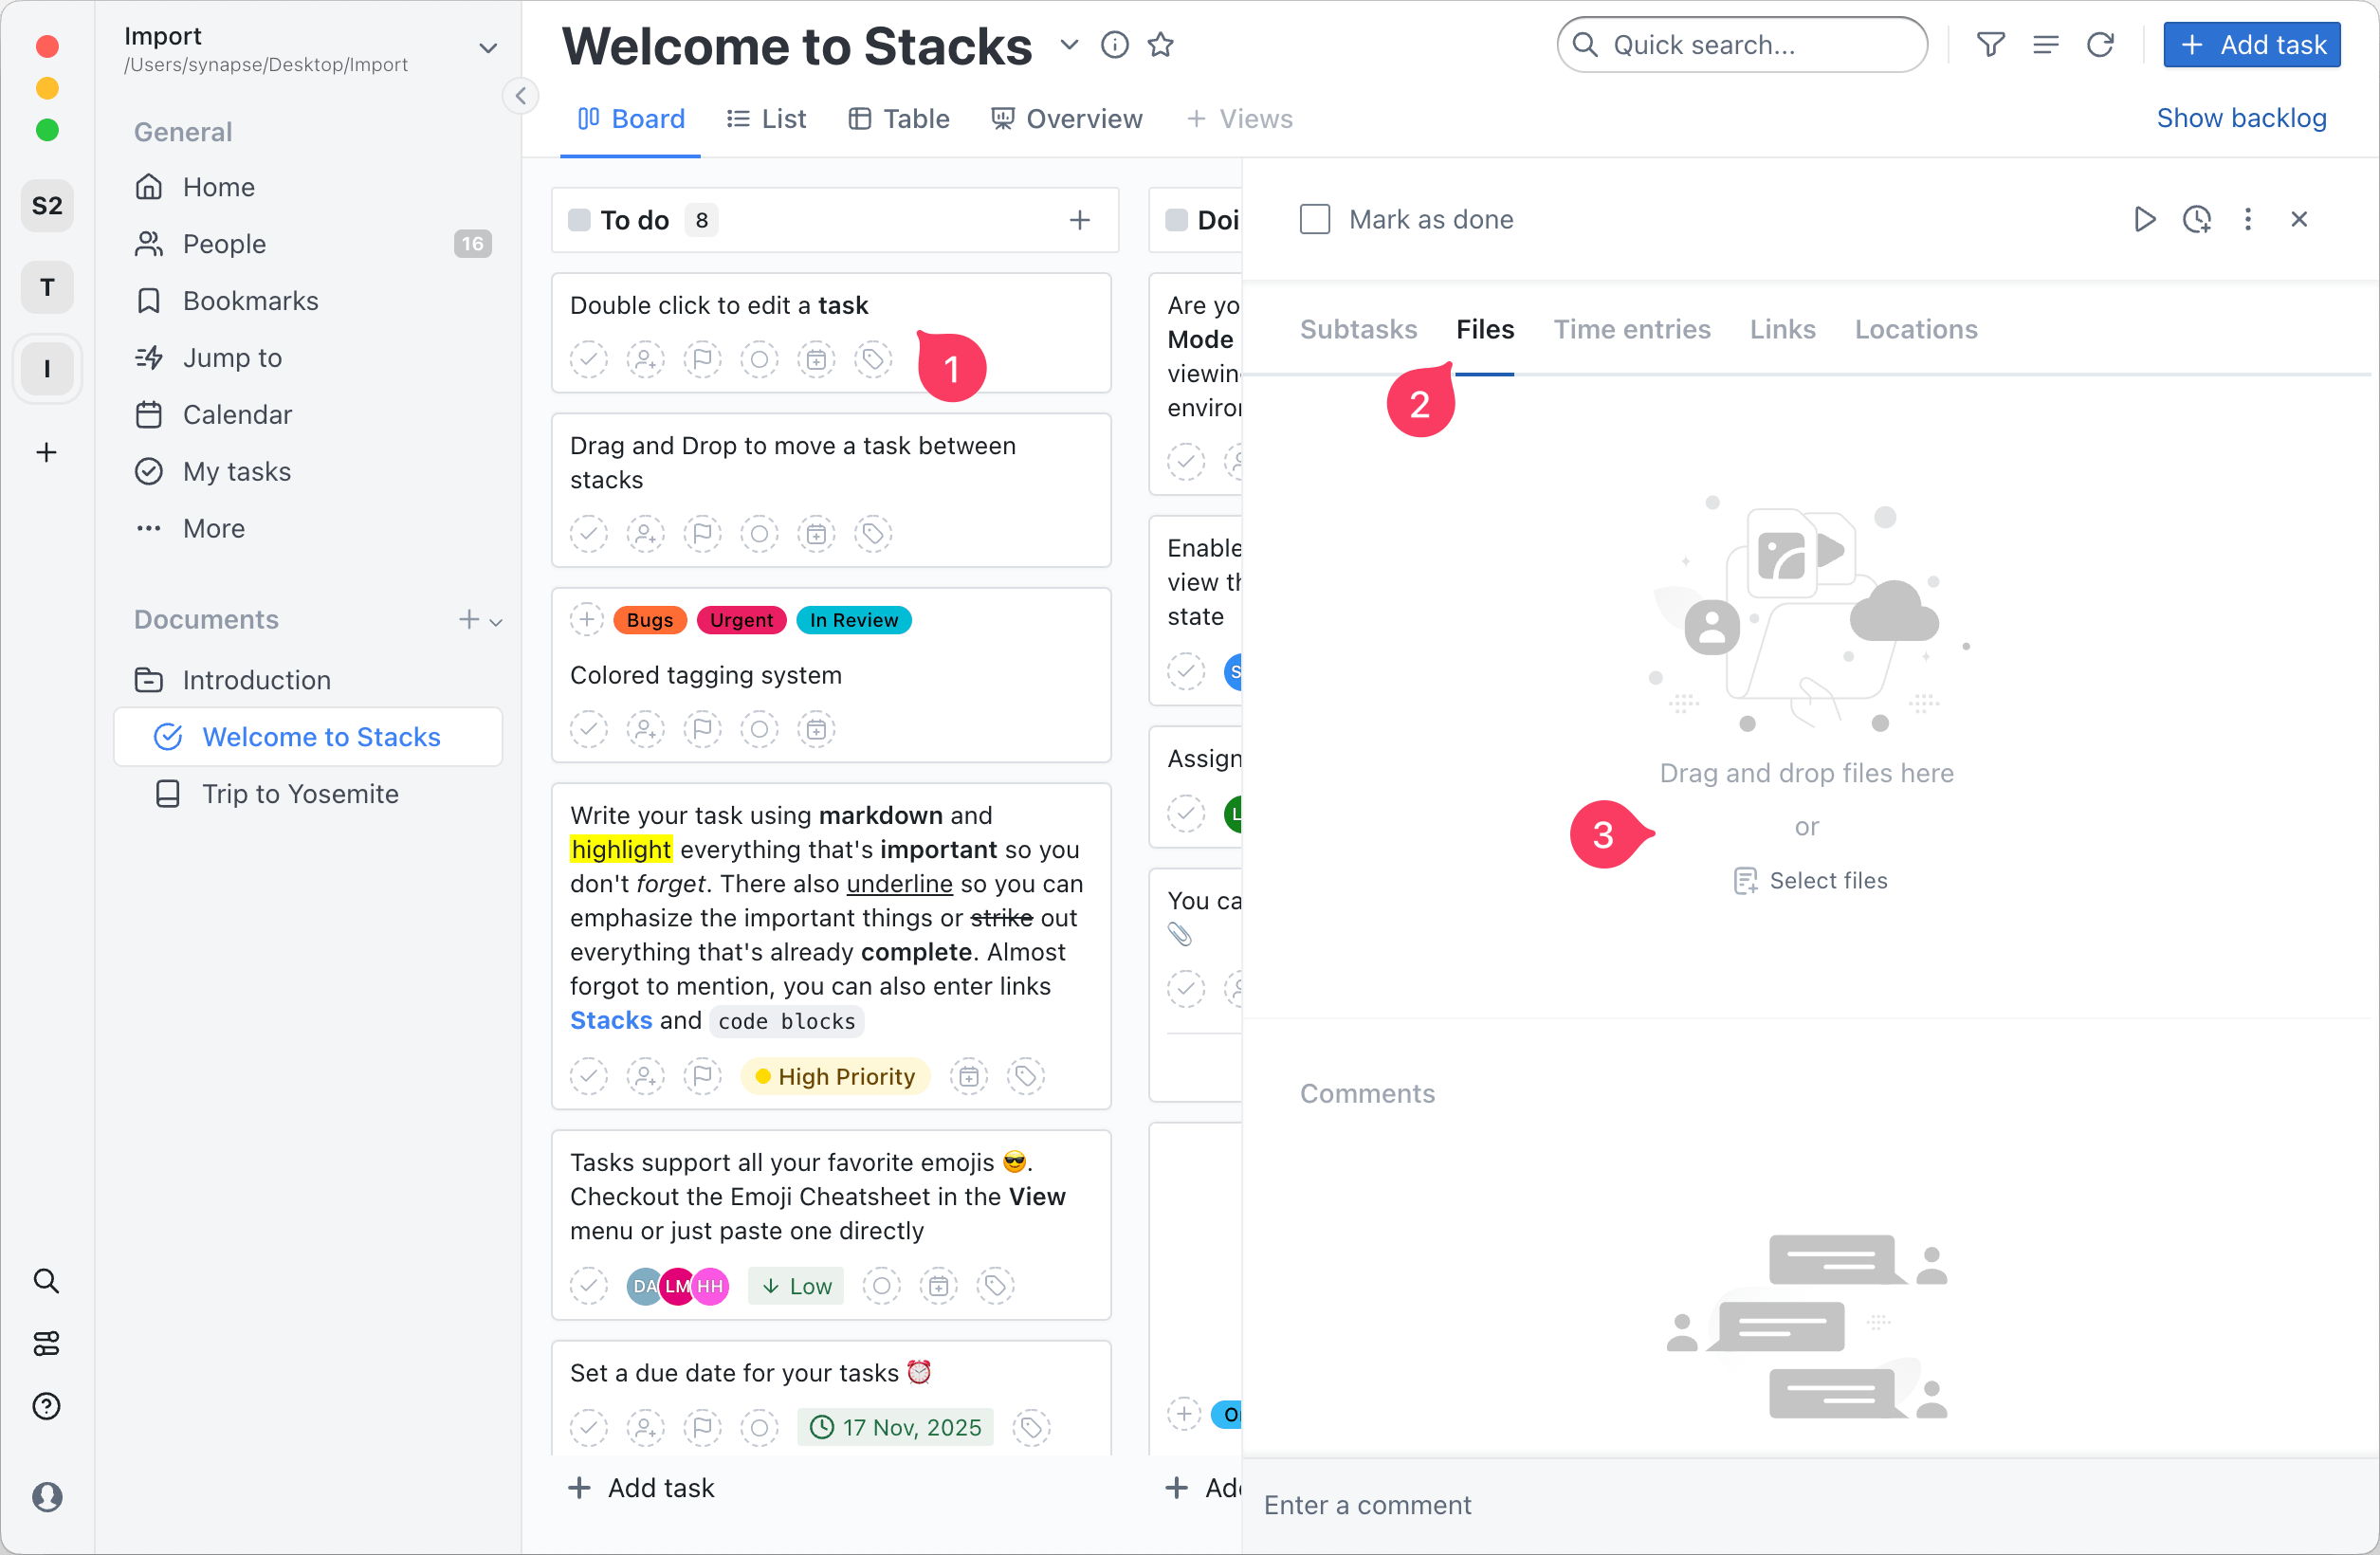
# Attaching files
To attach a file follow these simple steps:
- Click the task where you want to attach files
- Scroll down and click the
Filestab - Click on the
Select filesbutton or drag-and-drop and files on the panel to attach
TIP
When attaching a file Stack will create a phisical copy of it into the workspace folder.
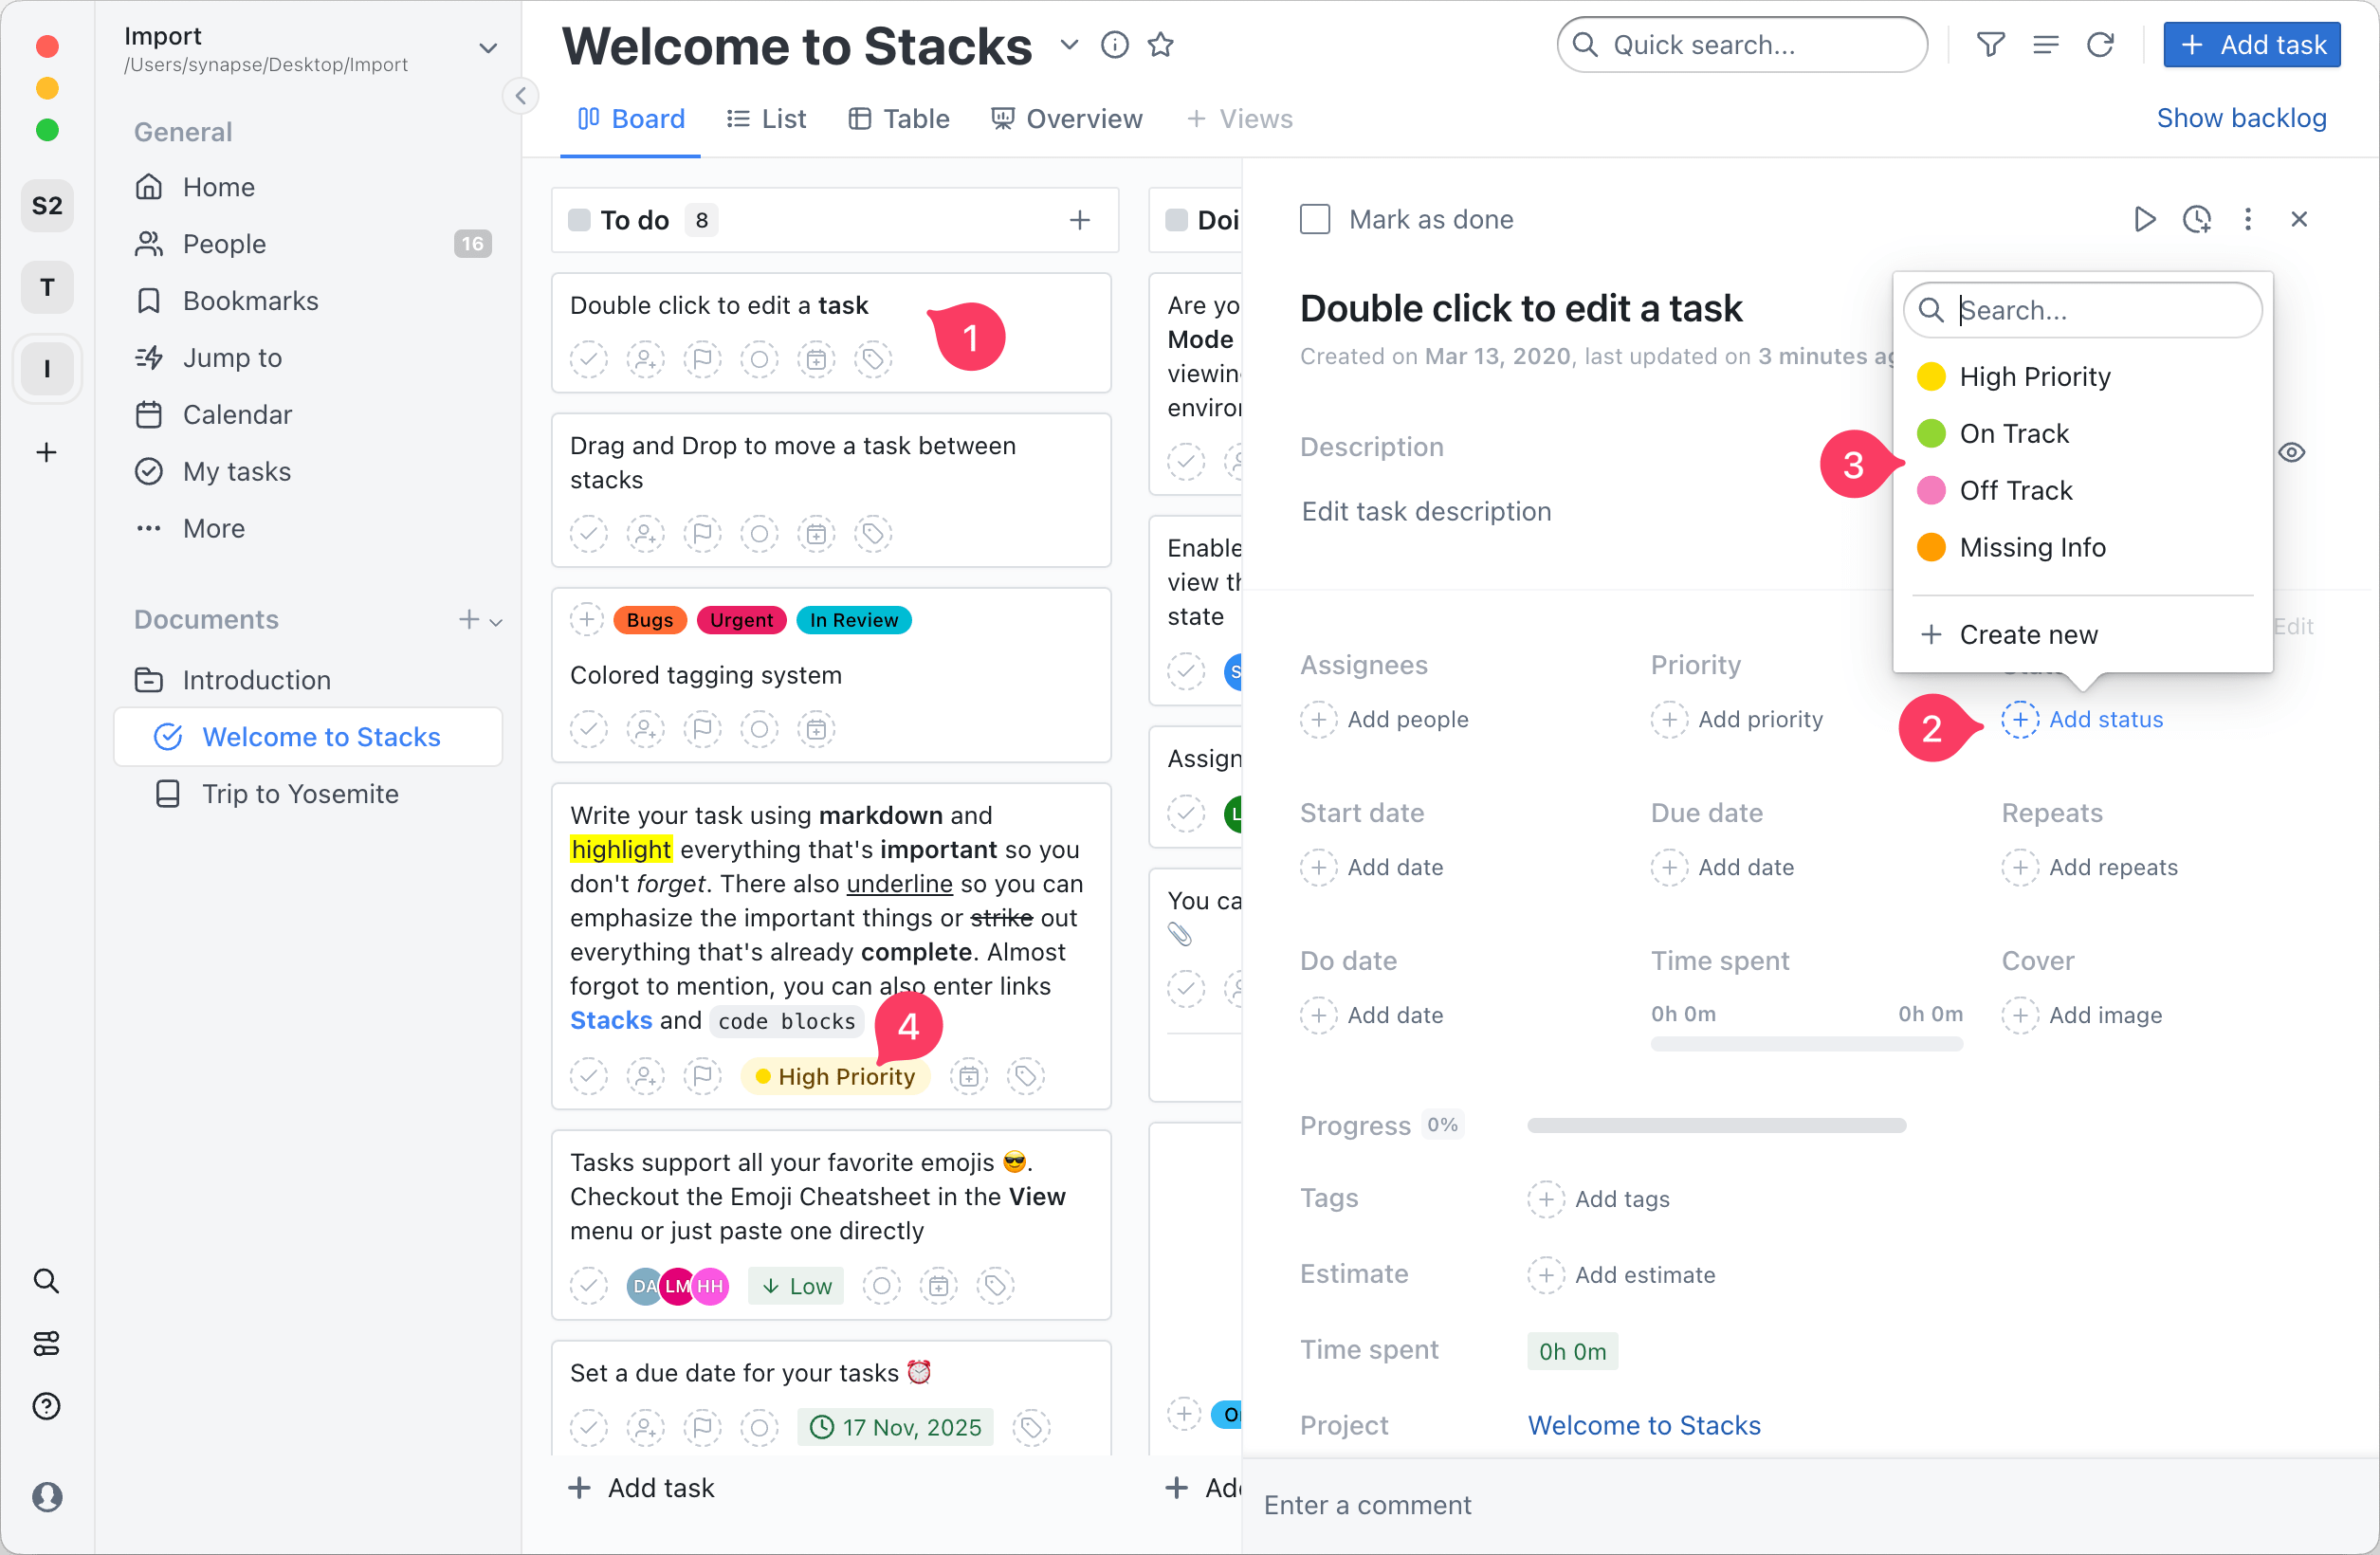
# Assigning a status
To assign a task status follow these simple steps:
- Click the task where you want to add a status
- Click the
Add statusbutton - Search or select any status from the popup list
- The selected status will be shown in both the Task details and Task card
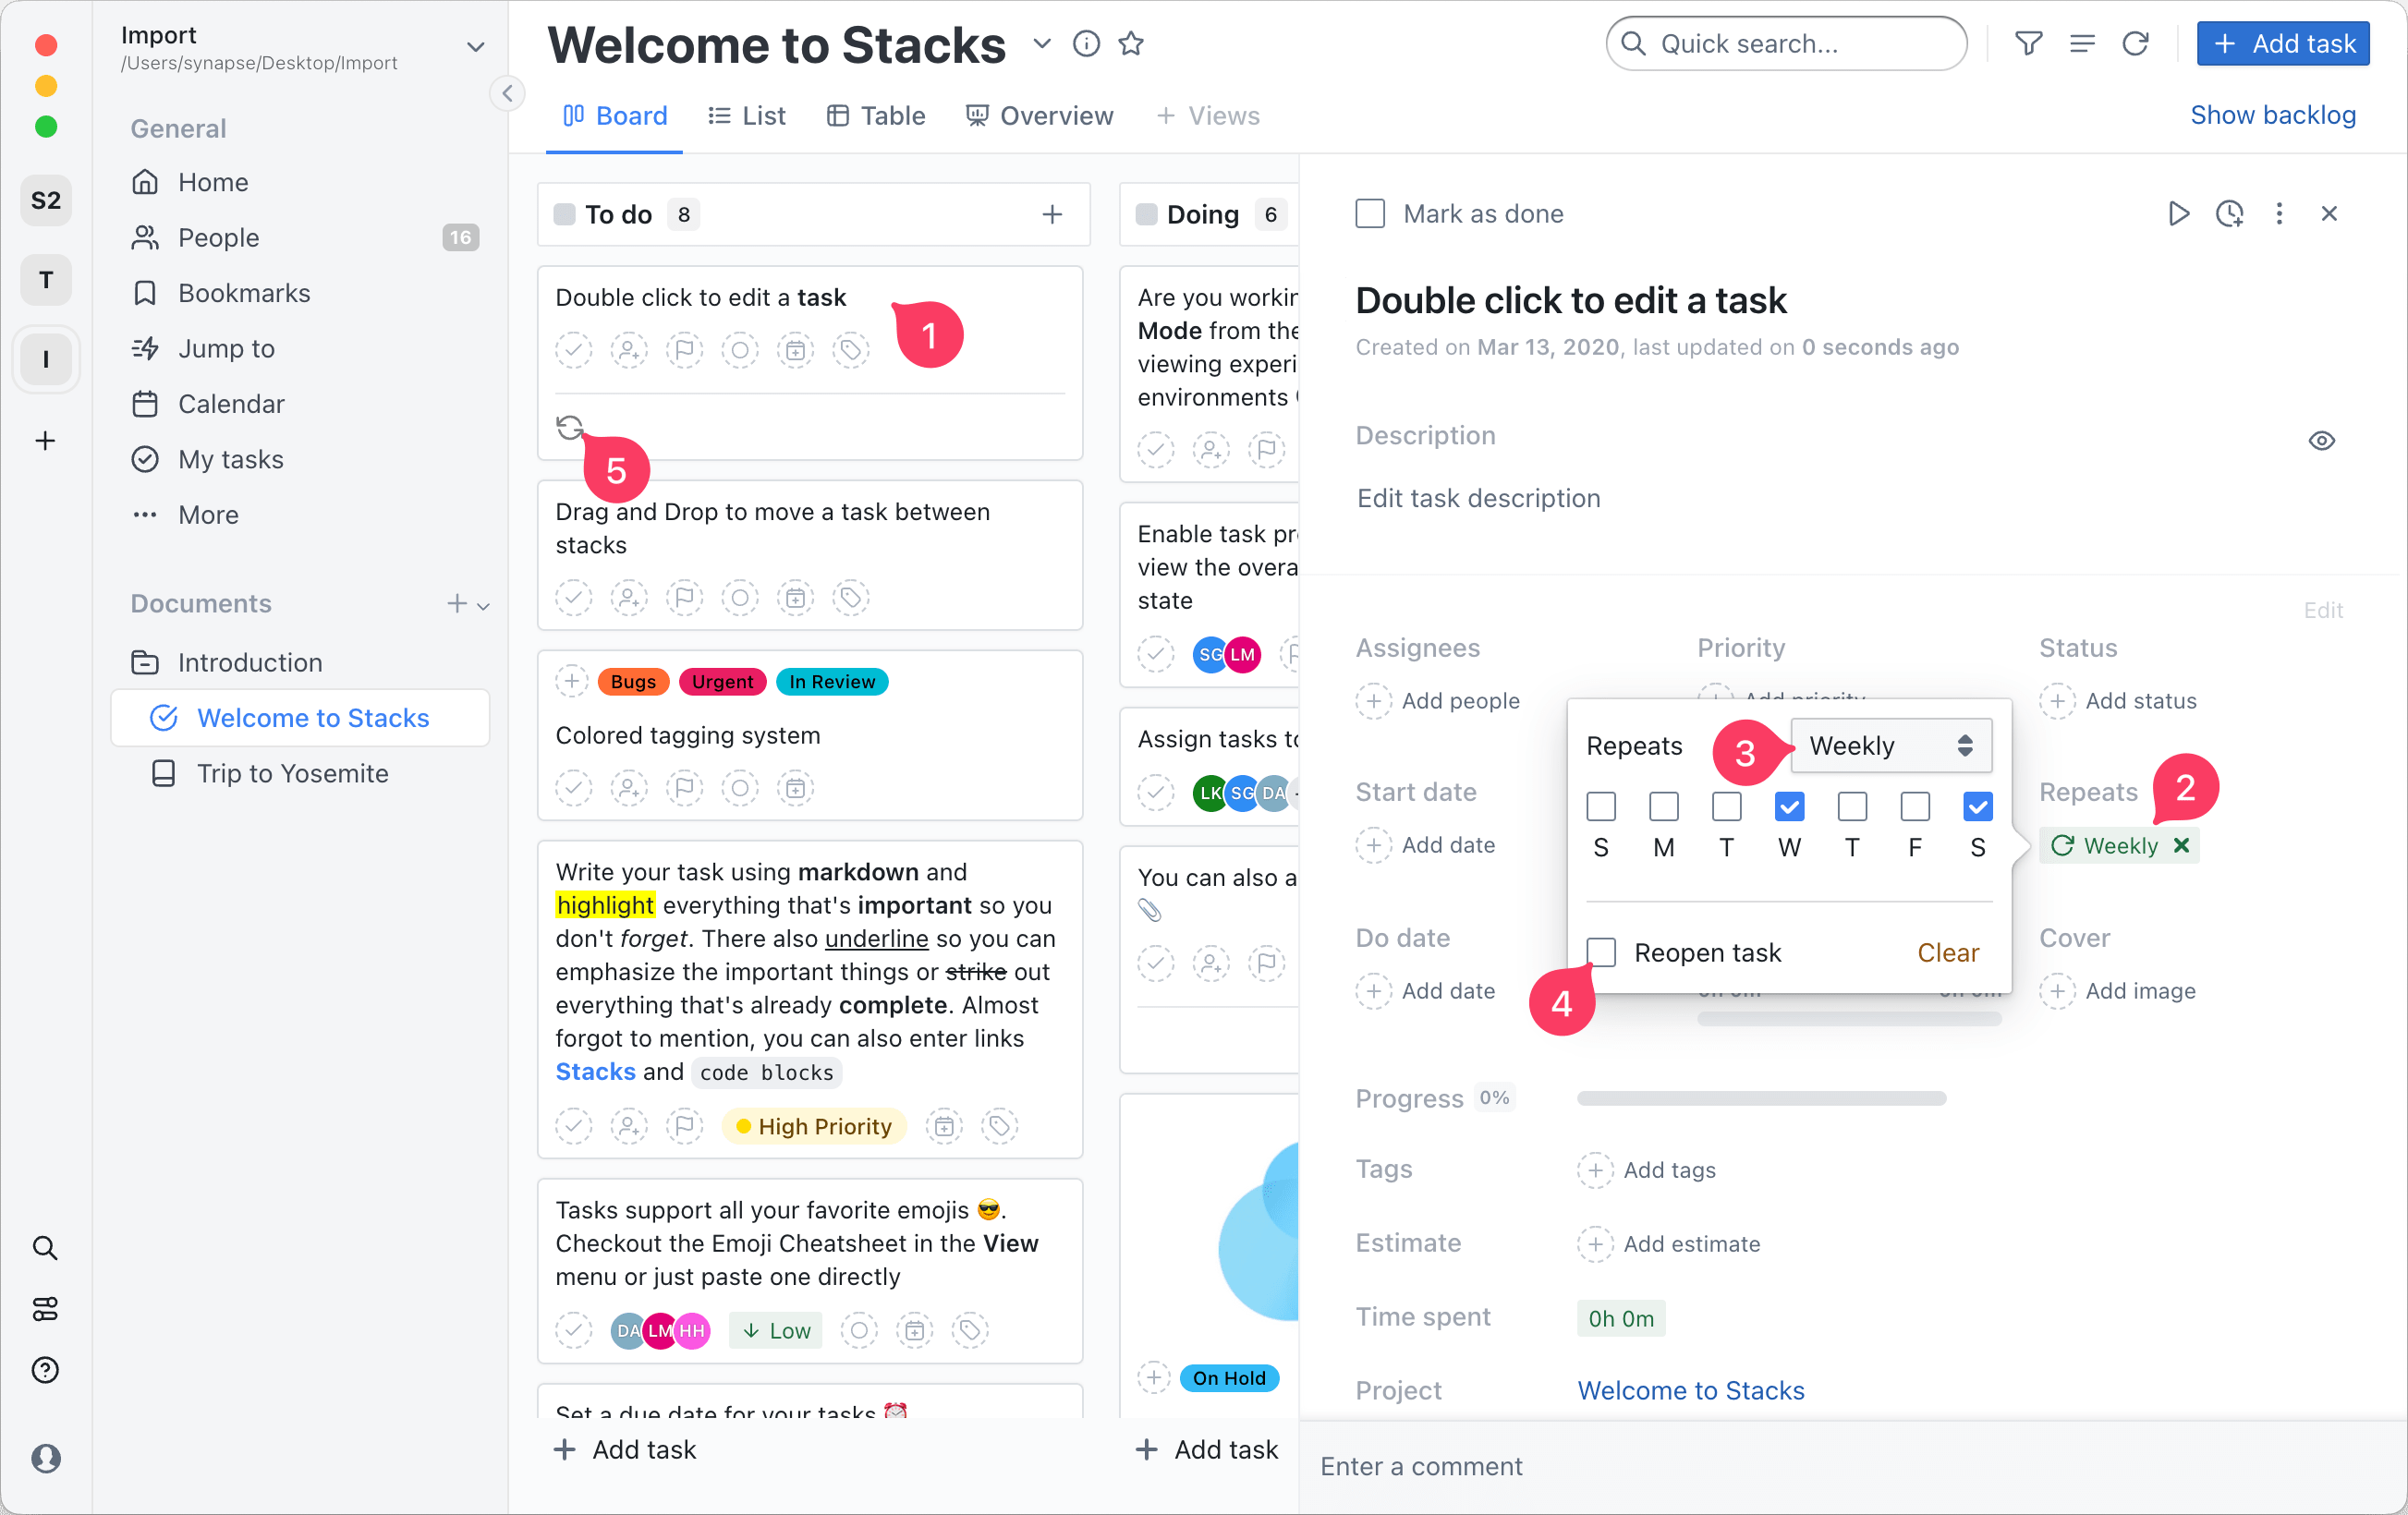
# Creating a recurring task
Recurring tasks are a good way to either reopen or create a new one (identical to the original) once it was marked as done. There are several way to make a task repeat, and each of them will update the due date accordingly:
- Daily
- Weekly
- Monthly
- Yearly
- Periodically
To make a task repeat follow these steps:
- Click the task which you want to recur
- Click the
Add repeatbutton in Task details - Select the repeat time span
- (Optionally) Select wether to reopen the task or create a new one instead
- Task cards will indicate if a task is recurring
# Changing the progress
# Changing the priority
# Editing the layout
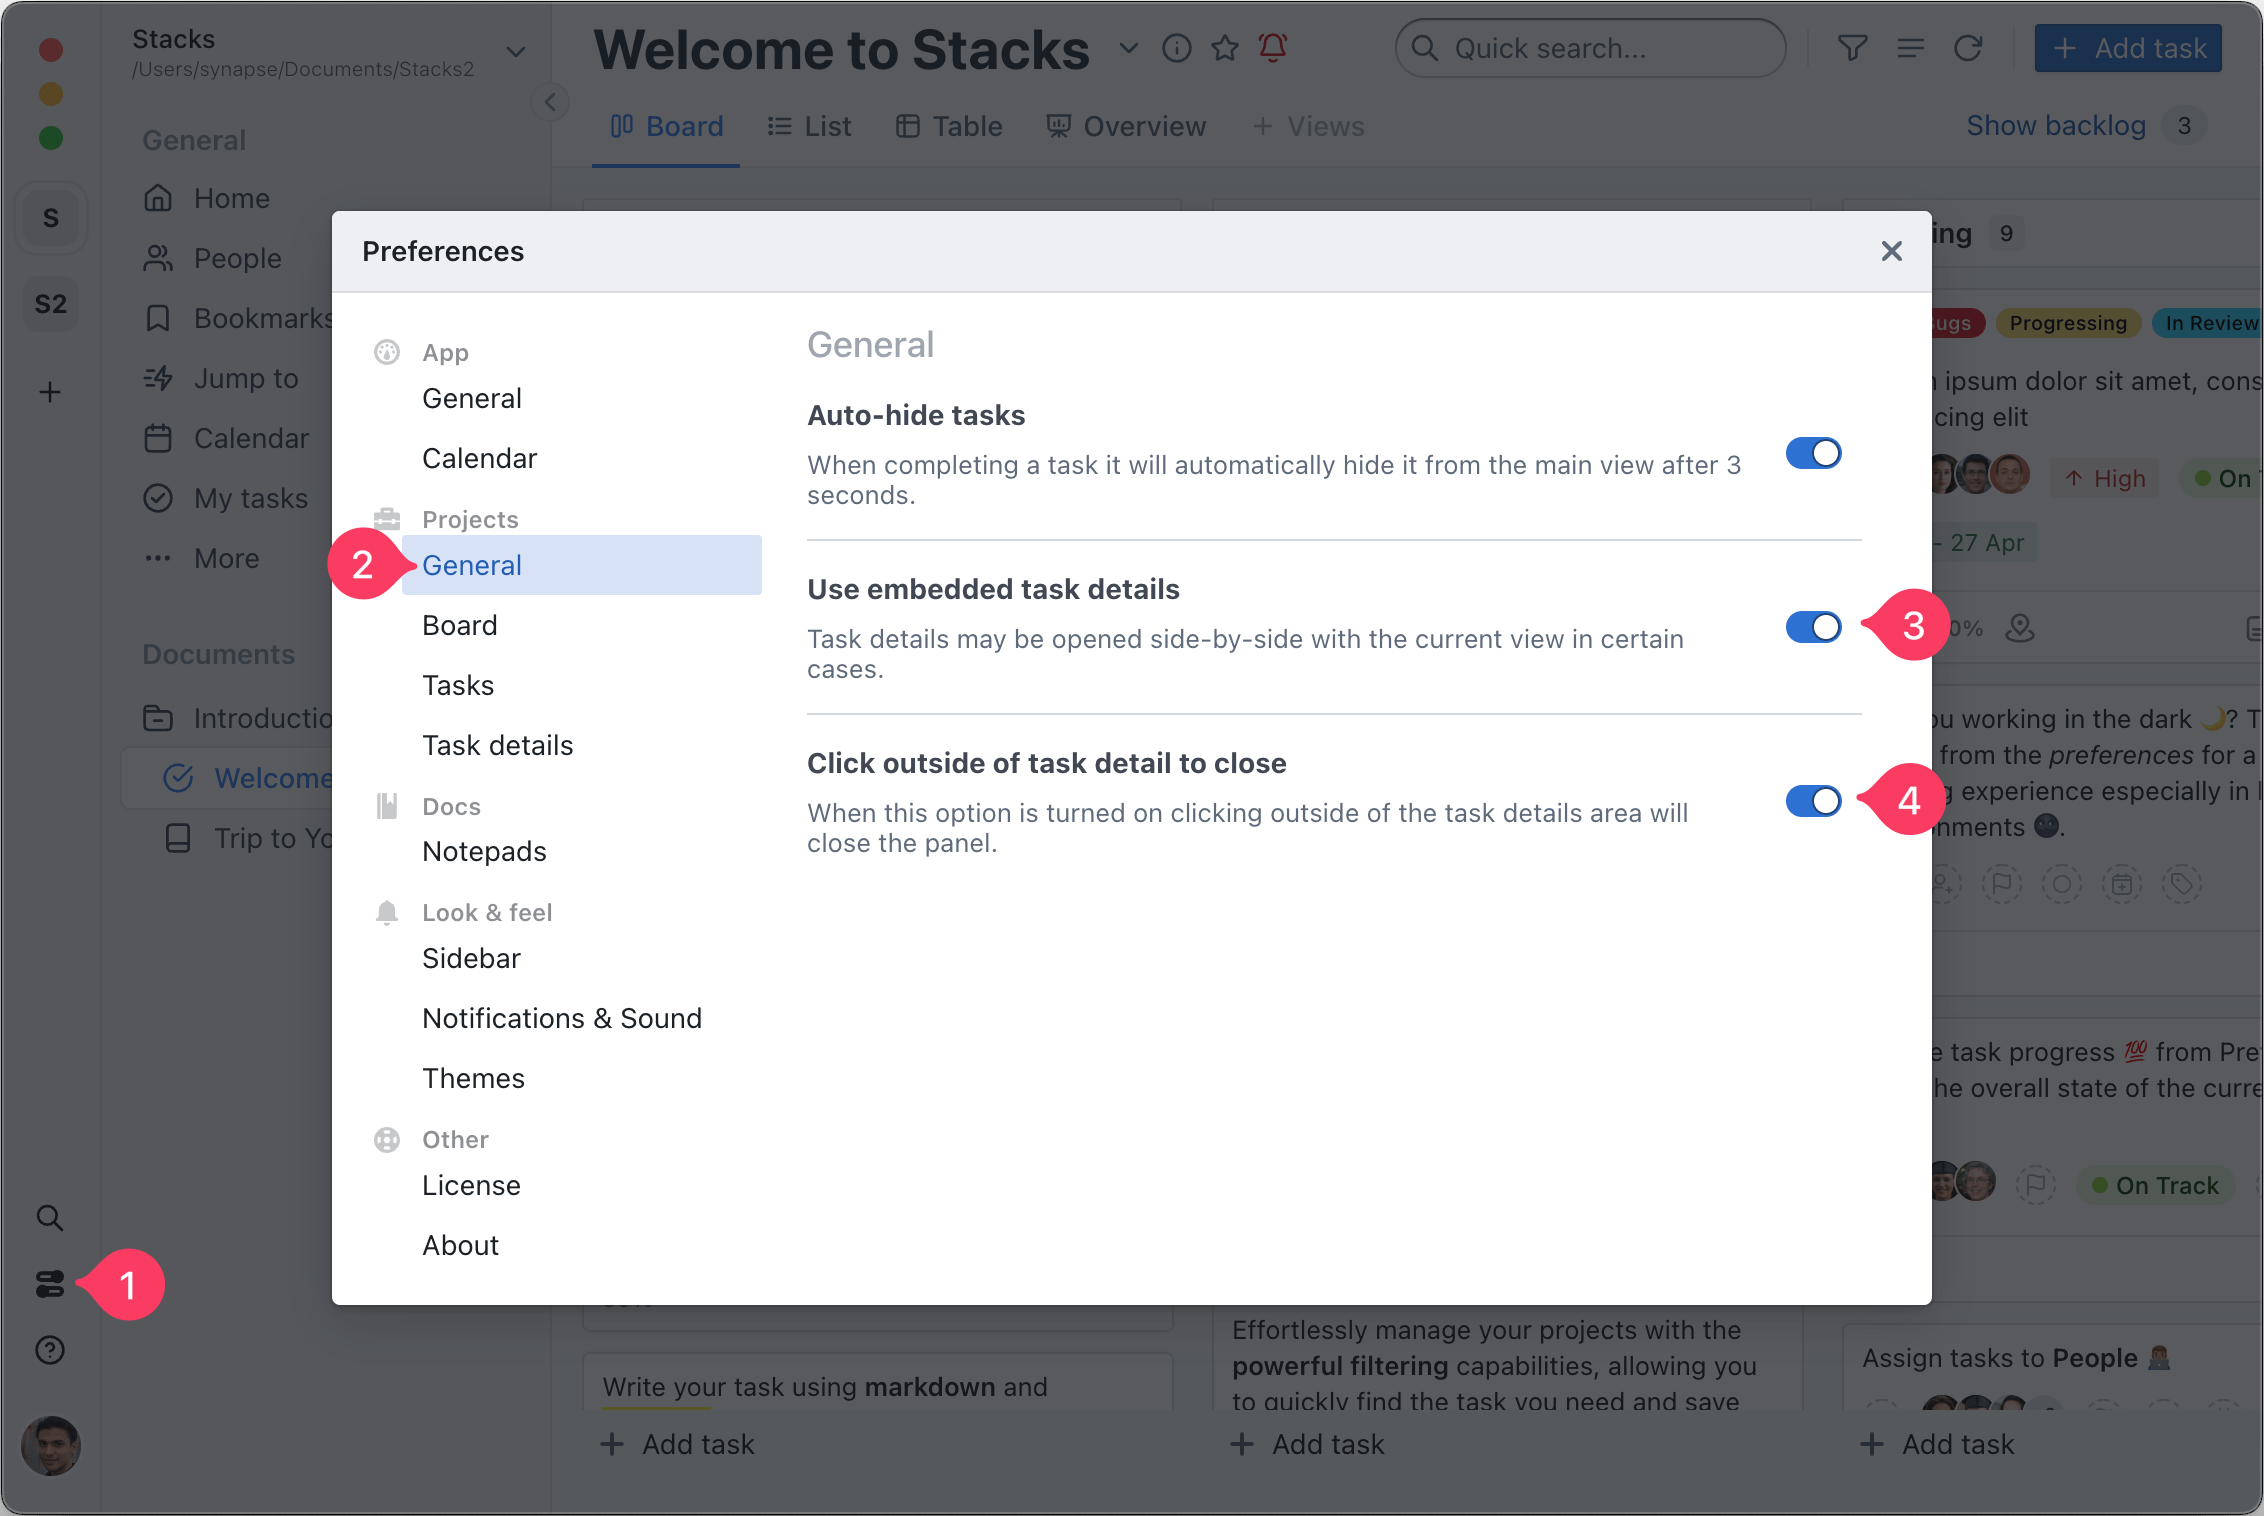
# Embedded panel
The task details can be moved to an embedded panel layout in the current view. This allows you to interract with both the tasks on the board view and the task details on the side. To enable this options:
- Open the Preferences
- Click on the
Generaltab under theProjectssection - Click and enable
Use embedded task details - (Optional) Click to enable if click outside of the task details area should close the panel