# Installation
WARNING
Please keep in mind that Stack Server is still under active development and therefore full backward compatibility is not guaranteed before reaching v1.0.0.
# Downloading the server
The Stacks server is based on PocketBase (opens new window) which is an open source backend consisting of embedded database (SQLite) with realtime subscriptions, built-in users management, convenient dashboard UI and simple REST-ish API.
The easiest way to get started is to download the prebuilt minimal PocketBase app from their website (opens new window).
# Downloading settings
The Stacks server require a couple of key components to make it work at its best. Download the latest version from our GitHub repo (opens new window). Copy the downloaded pb_hooks folder and pb_schema.json file to your desired location.
You should have the following folder structure:
- stacks_server
  - pocketbase
  - pb_hooks
  - pb_schema.json
# Running the server
Once you've downloaded and extracted the archive, you could start the server by running the following console command in the extracted directory: ./pocketbase serve.
And that's it! A web server will be started with the following routes:
http://127.0.0.1:8090- ifpb_publicdirectory exists, serves the static content from it (html, css, images, etc.)http://127.0.0.1:8090/_/- Admin dashboard UIhttp://127.0.0.1:8090/api/- REST API
The first time, when you access the Admin dashboard UI, it will prompt you to create your first admin account (email and pass).
PocketBase will automically create a new directory pb_data alongside the executable to store your application data and settings.
To check all avaialble commands and their options, you could run ./pocketbase --help or ./pocketbase [command] --help
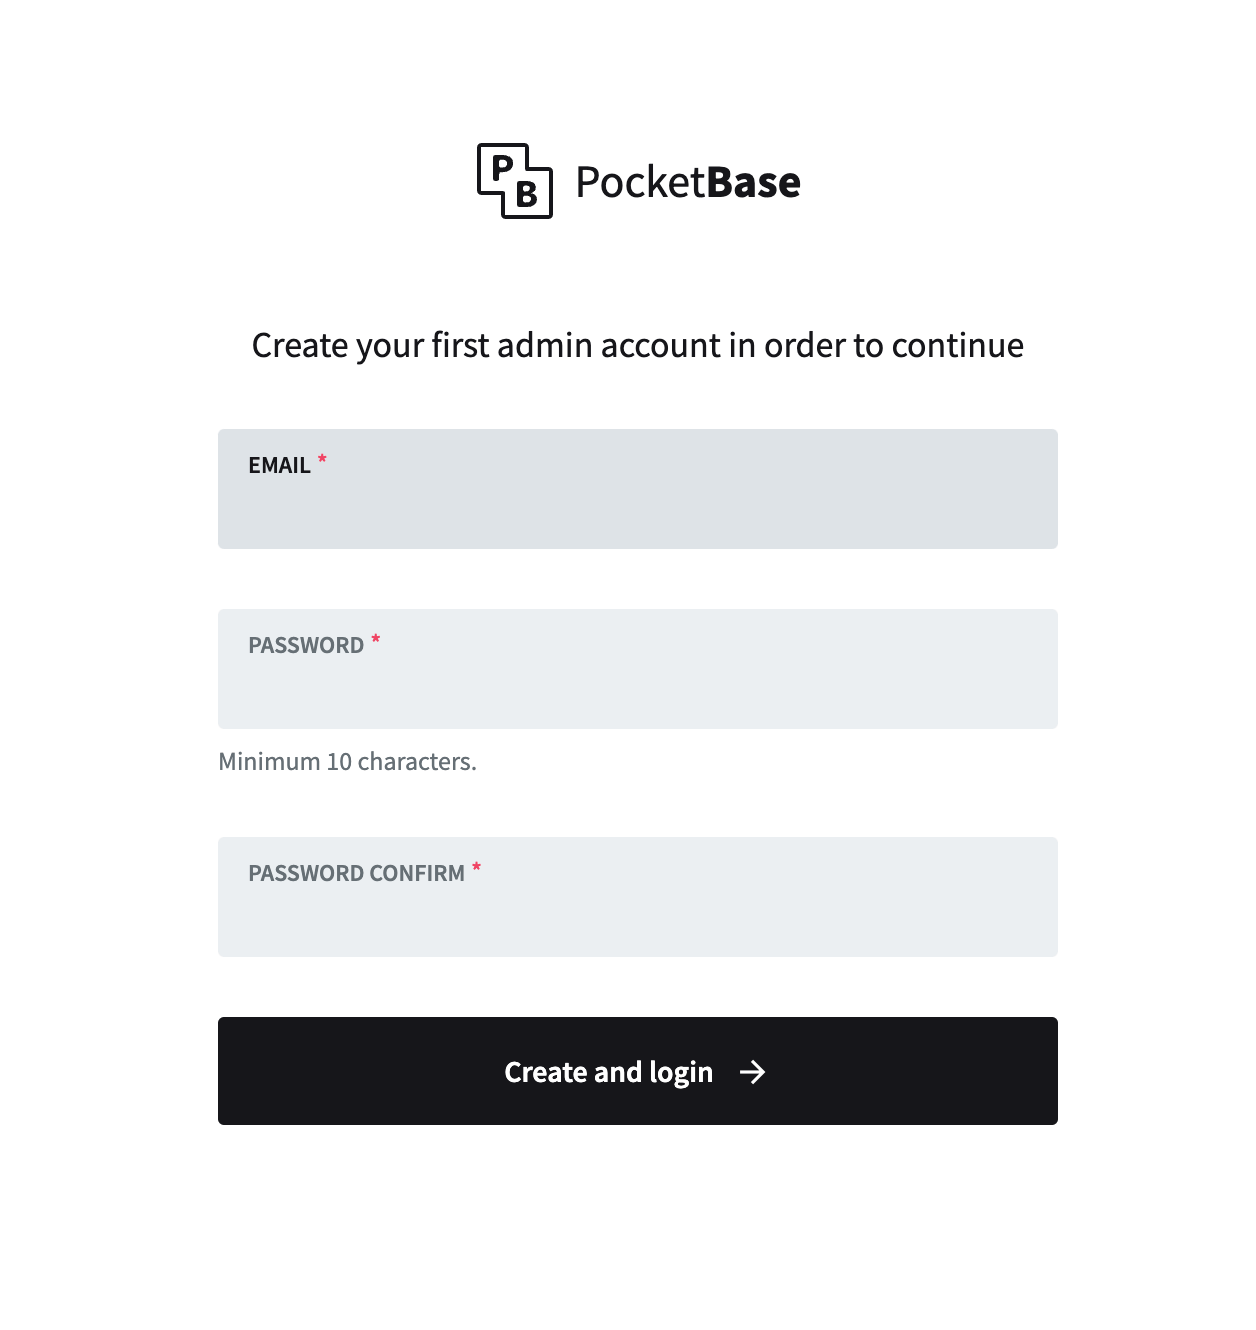
# Creating the first admin account
Open your default browser and open the following URL http://127.0.0.1:8090/_/ (or the default domain where the server is hosted). You should see the a form just as the one shown in the screenshot below.
Fill the form and hit Create and login to continue configuring the server.
# Importing server settings
In order to work properly with the Stacks app the server needs to import the custom pb_schema.json configuration file. Check the previous step in case you're missing this file, and follow the next 3 steps:
- click on
Settings - click
Import collectionsfrom the sidebar - click the
Load from JSON filebutton and select thepb_schema.jsonfile
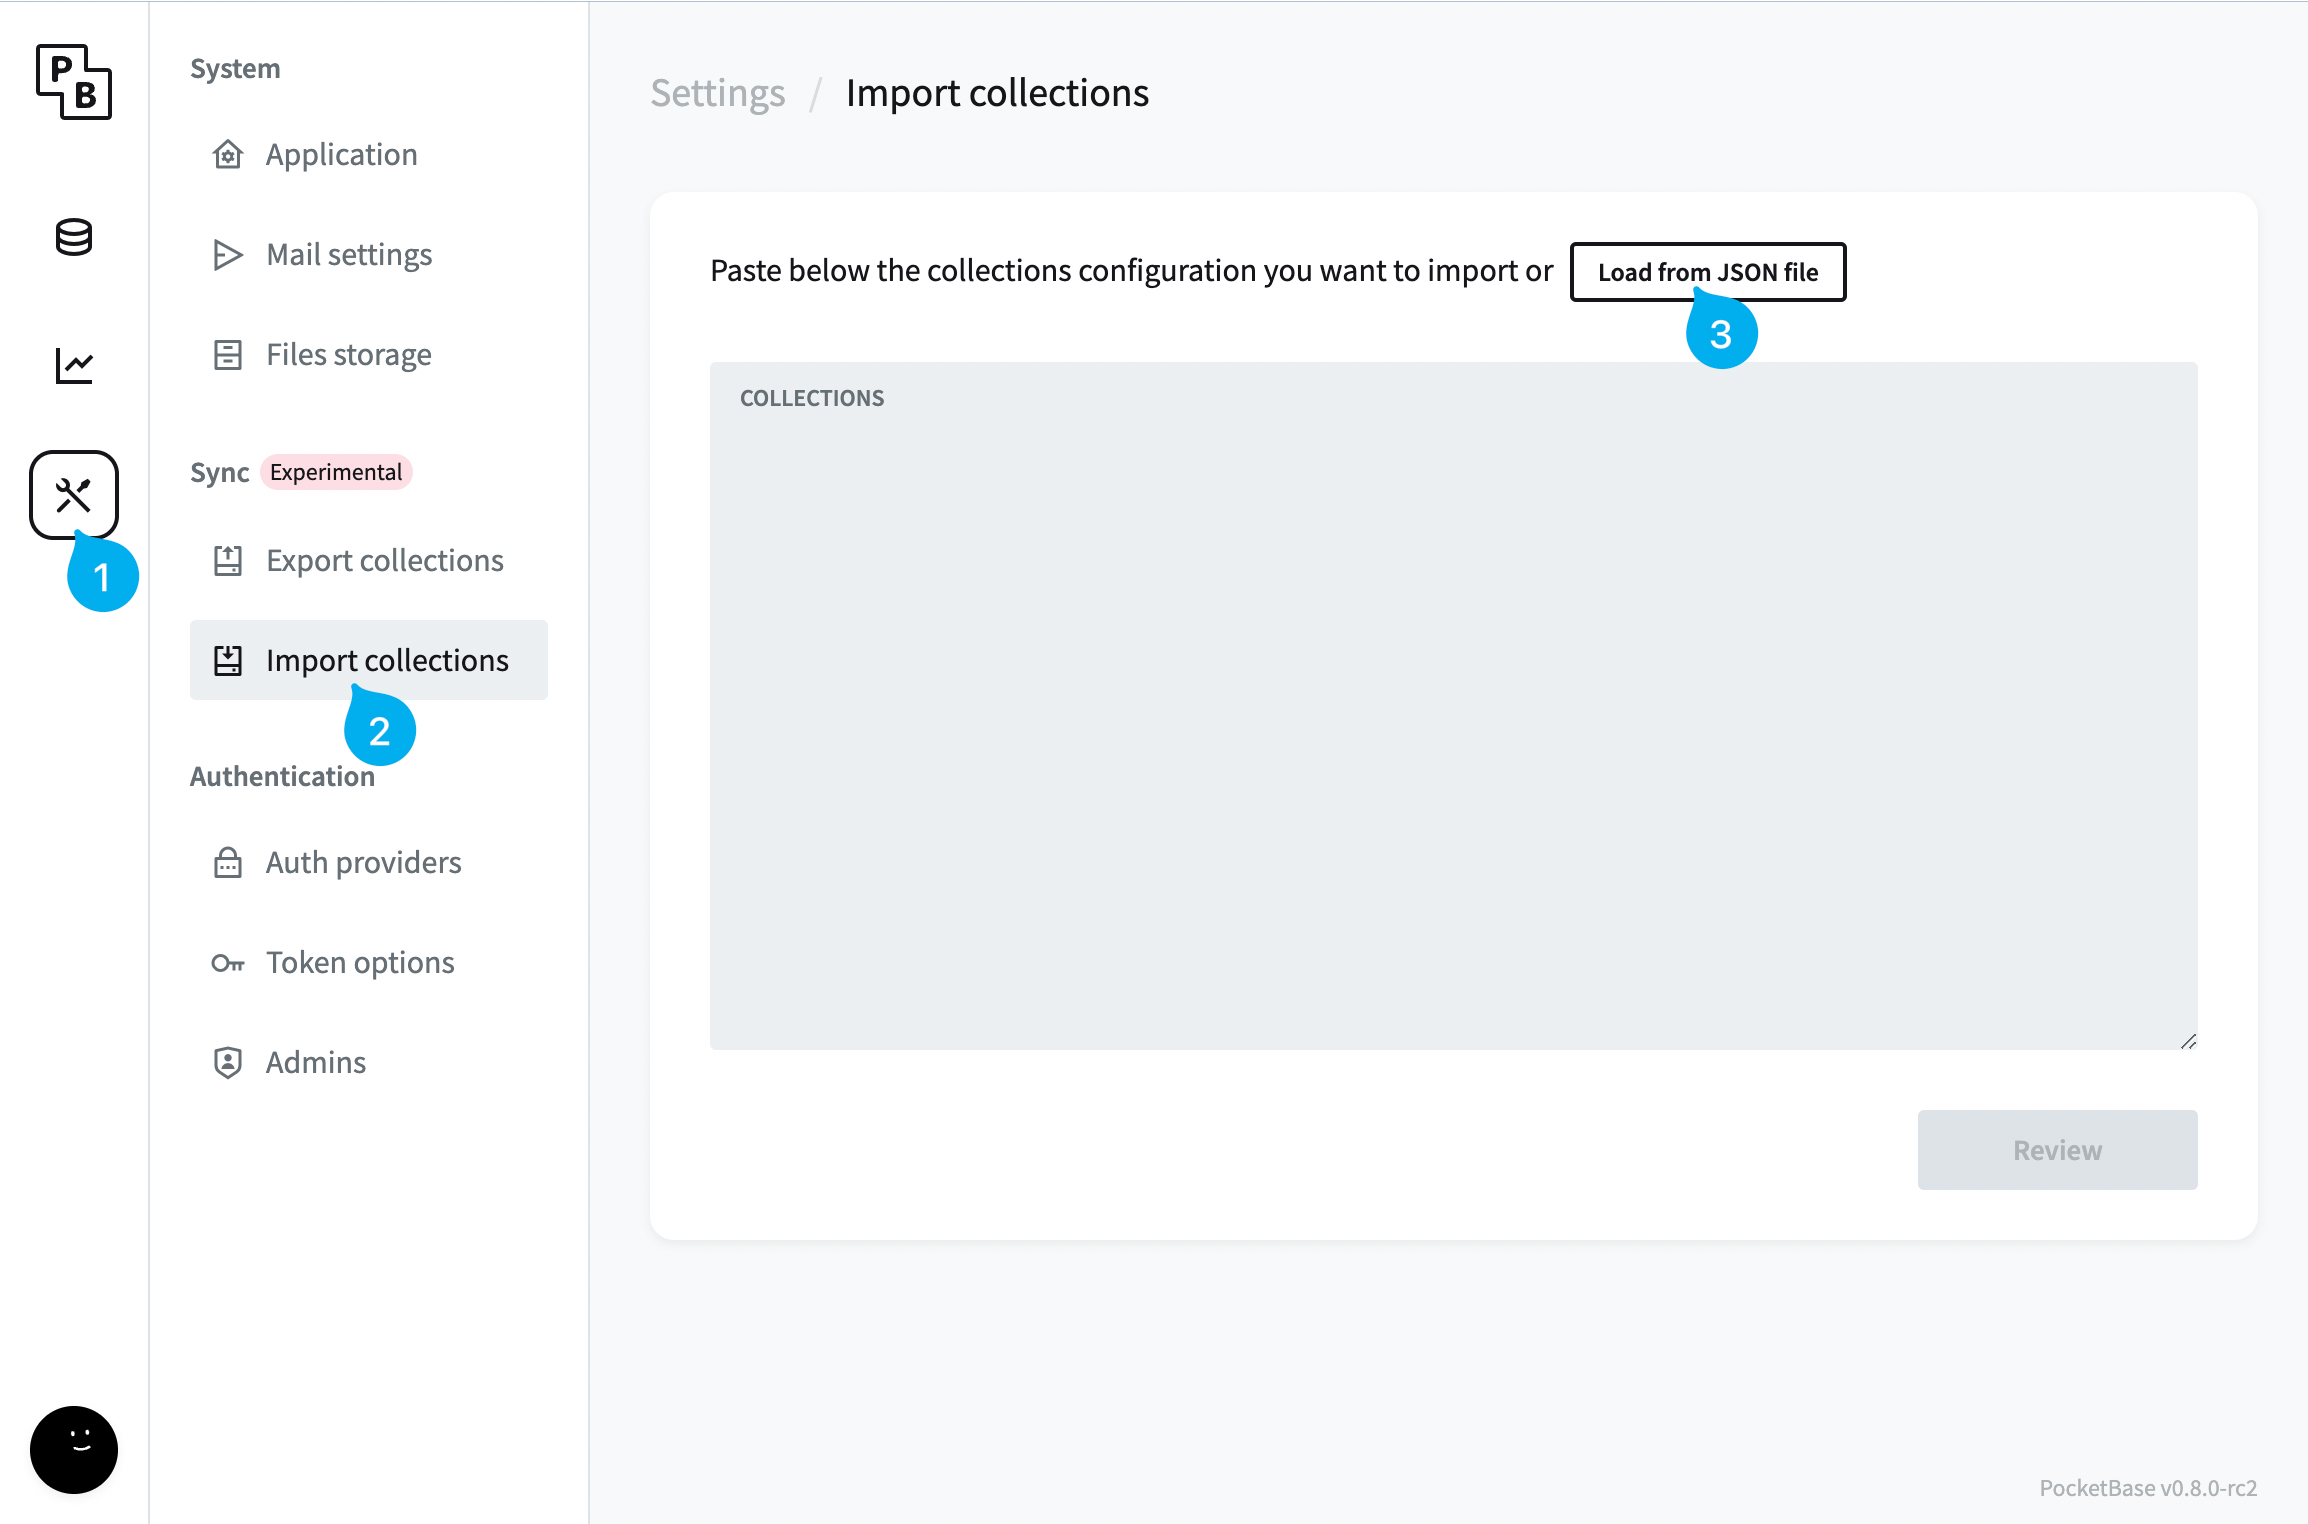
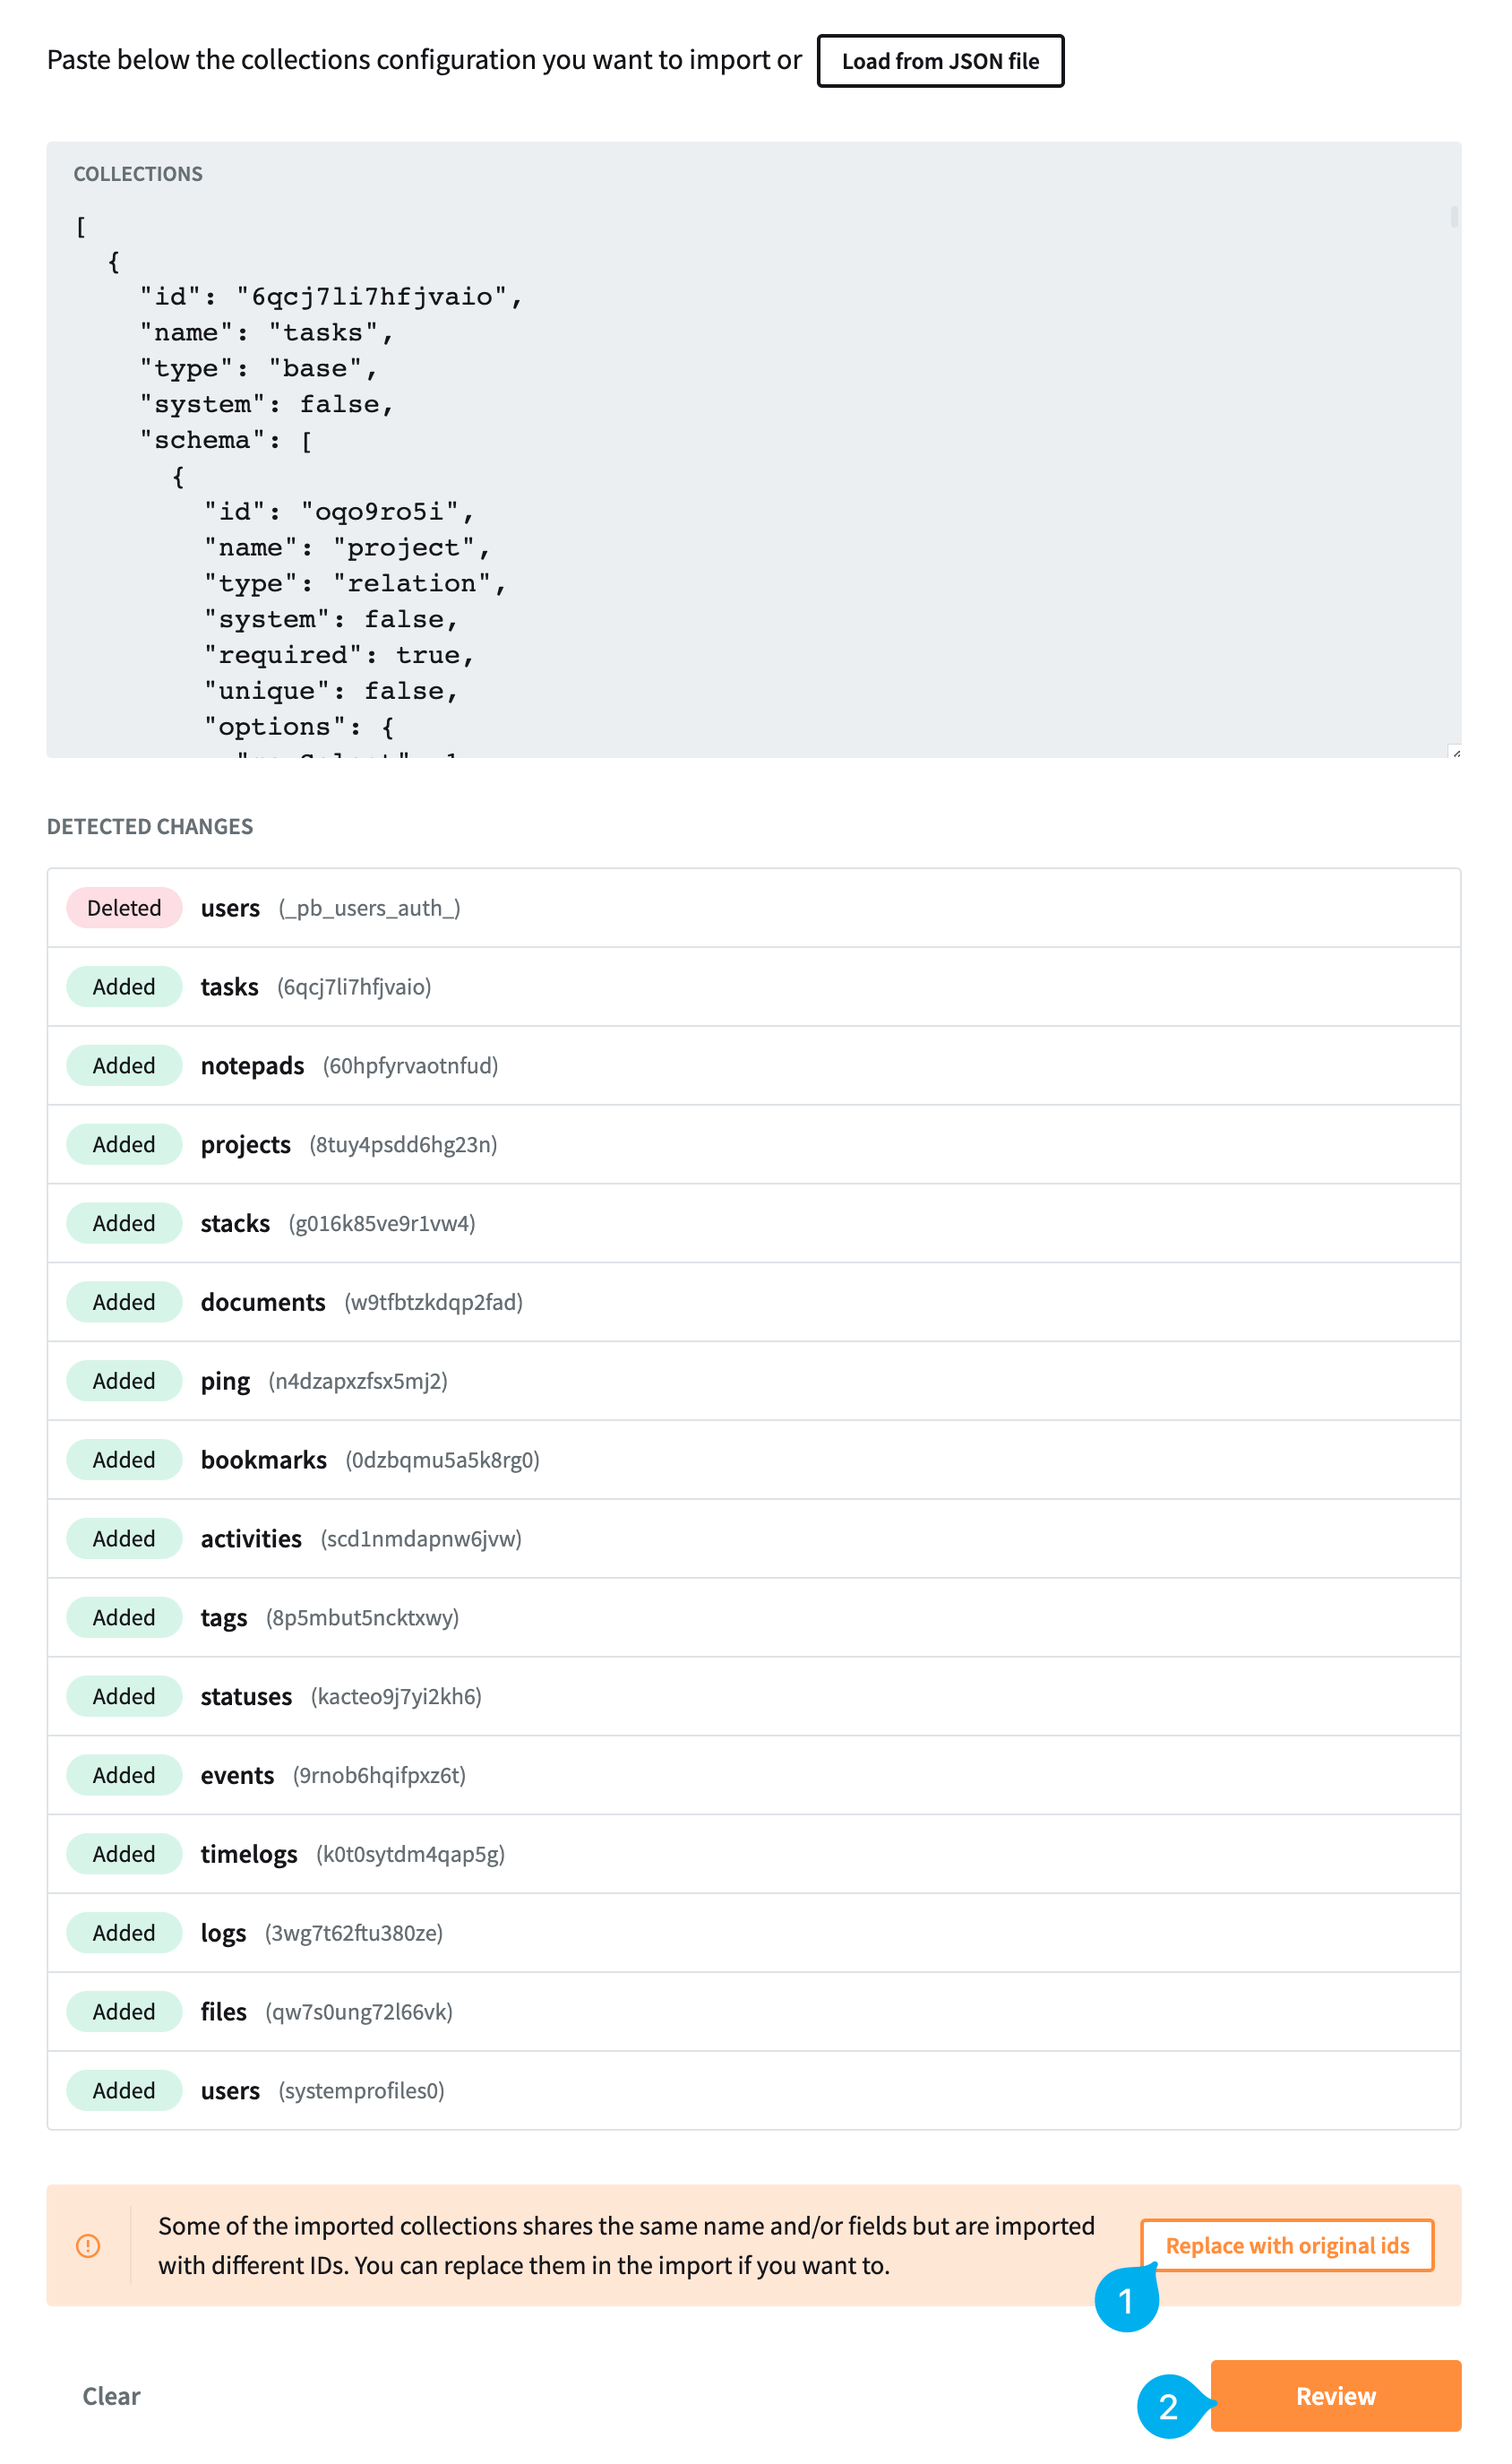
As soon as the JSON file file is loaded you should see something as shown in the screenshot below.
To proceed:
- click the
Replace with original idsbutton - click the
Reviewbutton
WARNING
Replacing original ids should only be done when installing it for the first time
When the modal window is visible:
- click the
Confirm and importbutton - click
Yes(red button) to confirm and proceed with the import
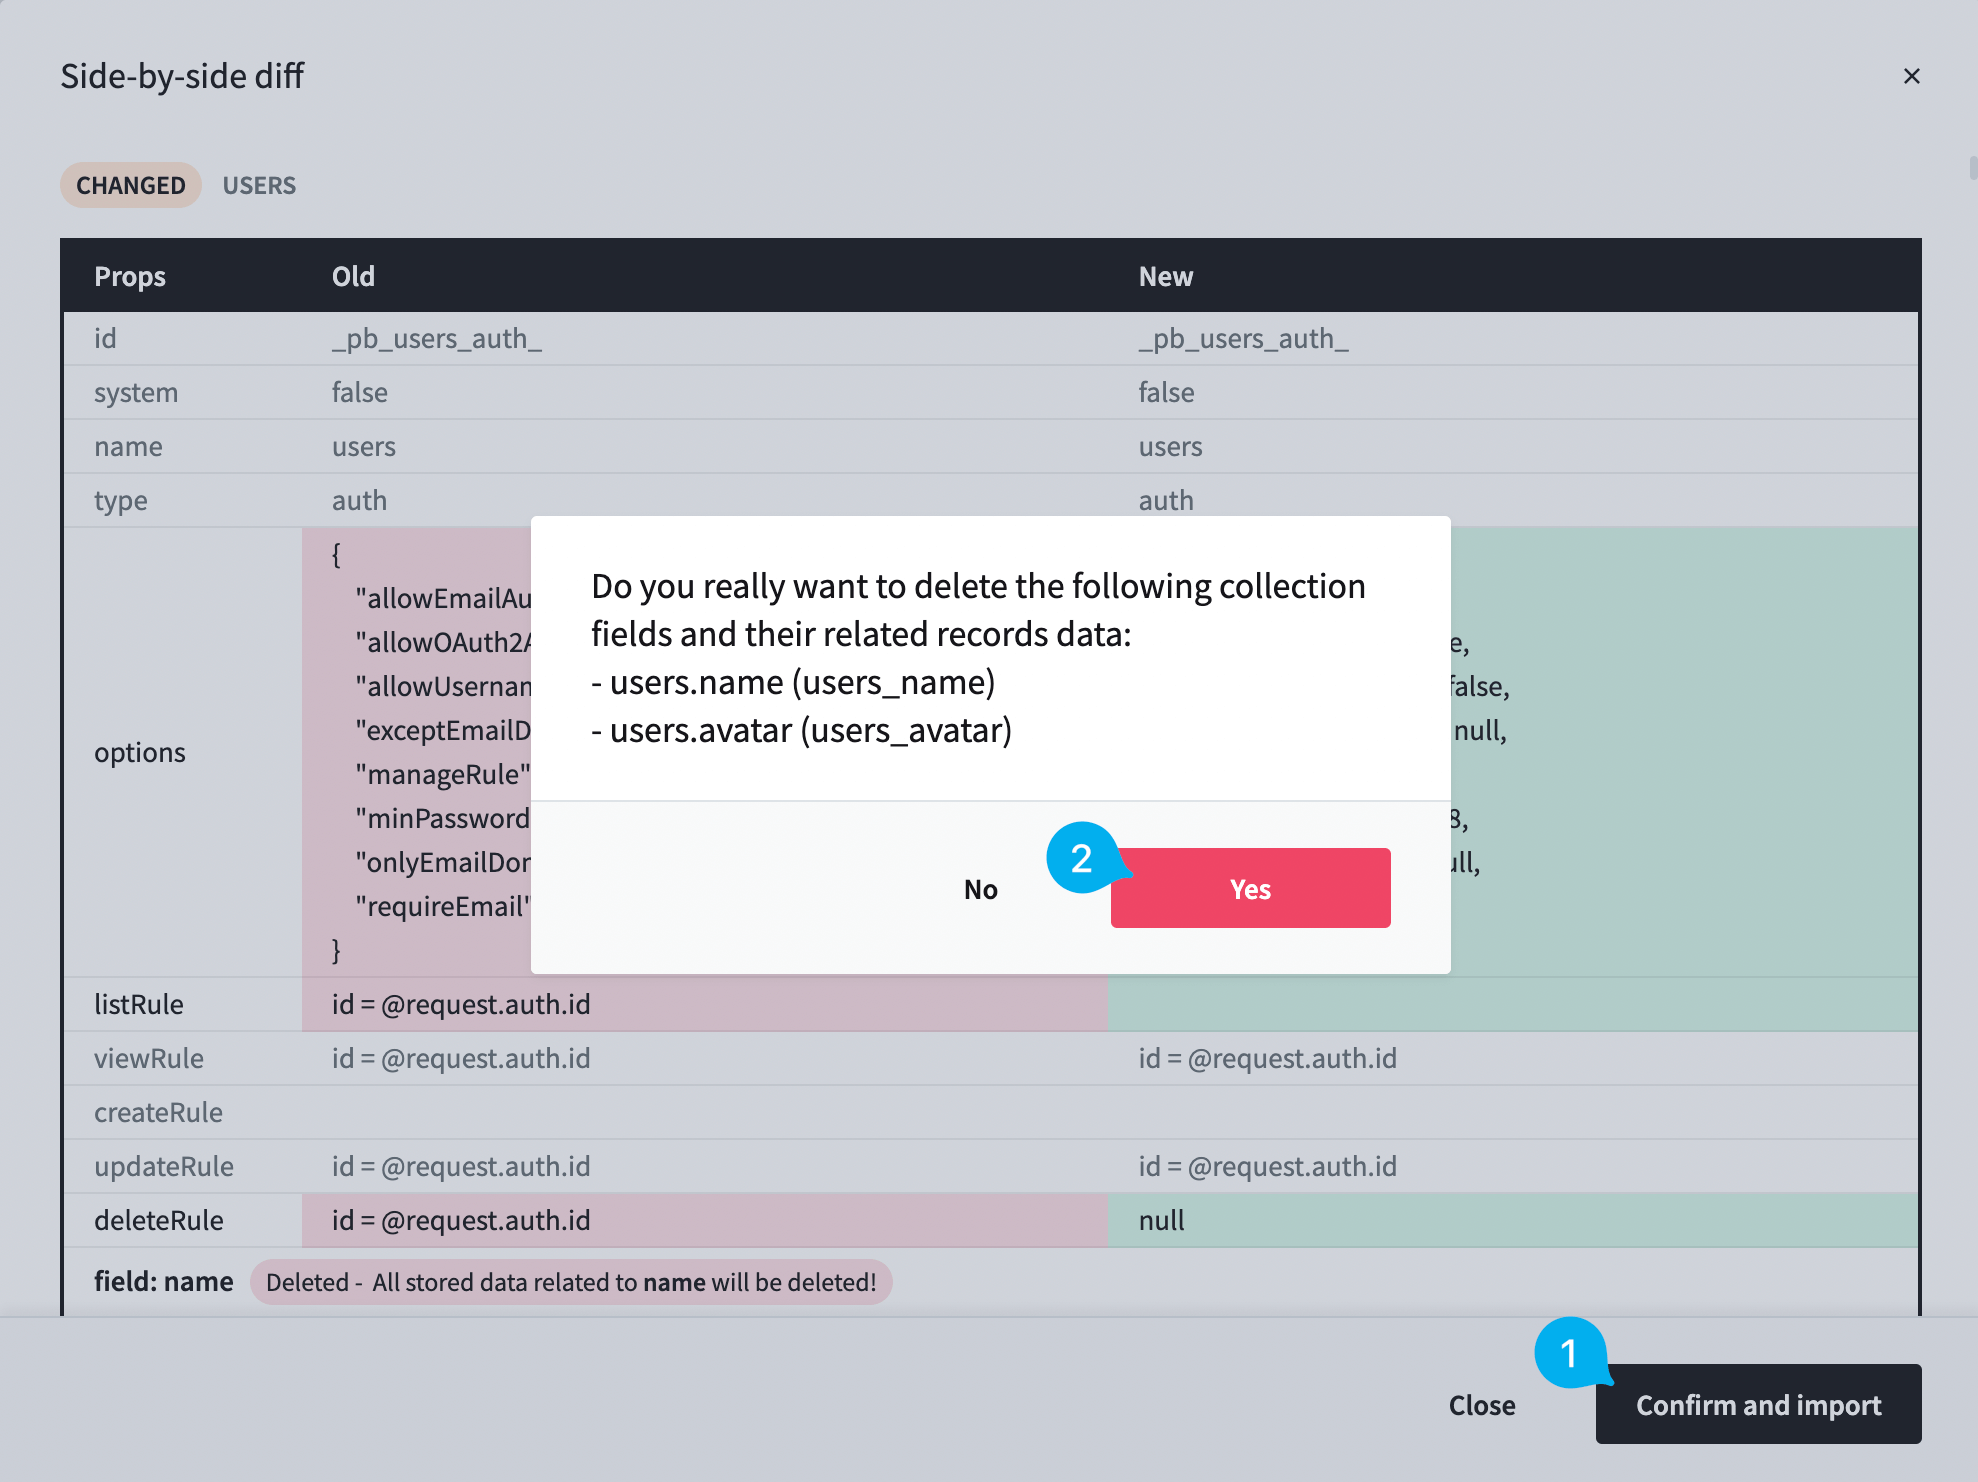
The server setup should be finished.
To be able to login from the Stacks app you'll need to add your first user. Click here to read more on how manually to add users.